| Oracle® Data Mining Administrator's Guide 11g Release 2 (11.2) Part Number E16807-06 |
|
|
PDF · Mobi · ePub |
| Oracle® Data Mining Administrator's Guide 11g Release 2 (11.2) Part Number E16807-06 |
|
|
PDF · Mobi · ePub |
This chapter is intended for anyone who wishes to install Oracle Data Mining and its client interfaces on a personal computer or laptop running Microsoft Windows.
Note:
For production installations of Oracle Database with Oracle Data Mining, refer to the installation instructions for your platform.See the "Installing and Upgrading" page of the Oracle Database Online Documentation Library:
This chapter contains the following sections:
Oracle Data Mining is an option to Oracle Database Enterprise Edition. To perform data mining activities, you must be able to log on to an Oracle database, and your user ID must have the database privileges described in Chapter 4.
The instructions in this section explain how to perform a basic installation of Oracle Database Enterprise Edition on Microsoft Windows. Instructions for creating a starter database are included.
Important:
These instructions are not intended as a replacement for Oracle Database installation documentation. If you have questions, if you encounter problems during the installation, or if you already have Oracle components installed on your PC, refer to:For a high level introduction to Oracle Database installation and configuration, see:
Additional documentation is available on the "Installing and Upgrading" page of the Oracle Database 11g Online Documentation Library:
Before you begin the installation, ensure that your computer meets the system requirements described in Oracle Database Installation Guide for Microsoft Windows.
Note:
If your computer uses Dynamic Host Configuration Protocol (DHCP), you may need to install a loopback adapter to assign a local IP address to your computer.See Oracle Database Installation Guide for Microsoft Windows for instructions.
Log on to your computer as a member of the Administrator's group. If you are unsure if your user ID is in the Administrator's group, check User Accounts in Windows Control Panel.
Stop any Oracle services that may be running on your computer.
In Windows Control Panel, choose Administrative Tools, then Services. Find the service names that start with "Oracle". Choose Stop for each one.
Note:
To stop an Oracle database, first stop the database service (OracleServiceservice_name), then stop the database listener (OracleOraDb11g_homeTNSListener).To start the installation, run SETUP.EXE from the Database installation directory.
Oracle Universal Installer opens and displays the Configure Security Options page. Type your My Oracle Support email address. Click Next.
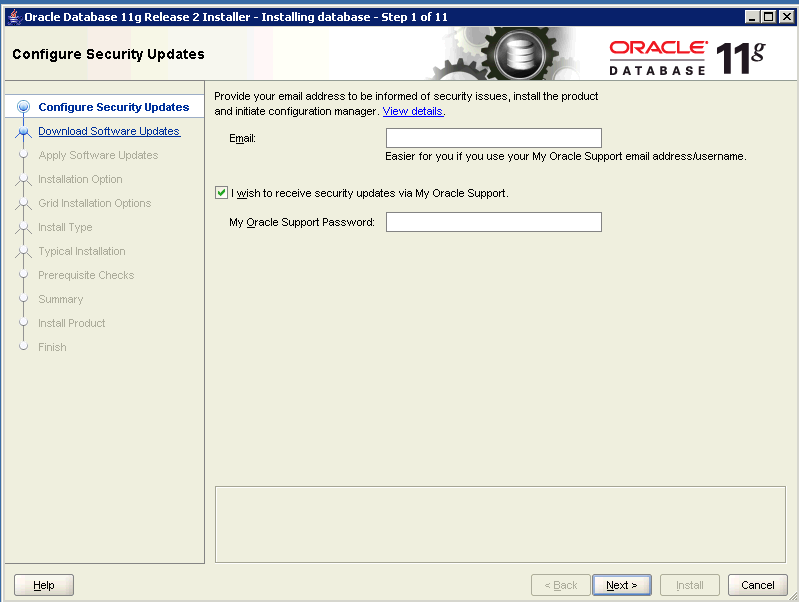
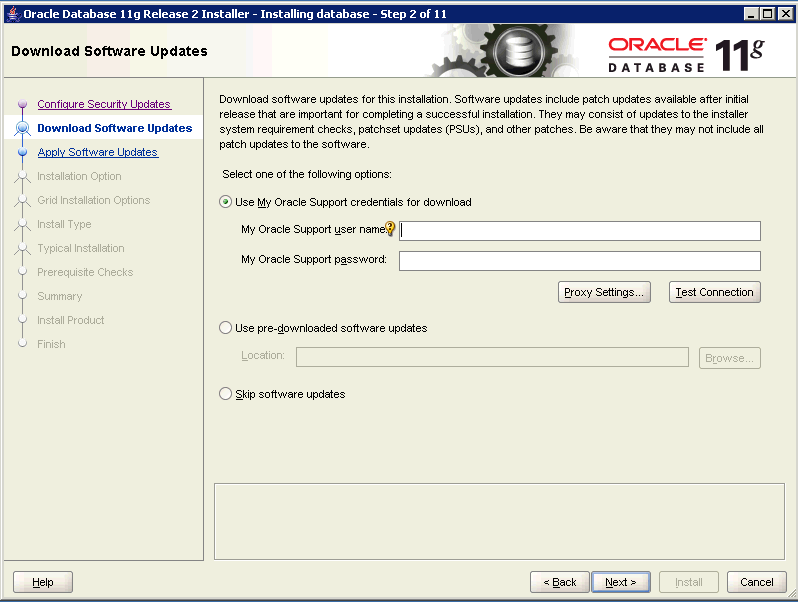
In the Download Software Updates box, type your My Oracle Support credentials if you want to automatically download software updates. Click Next.
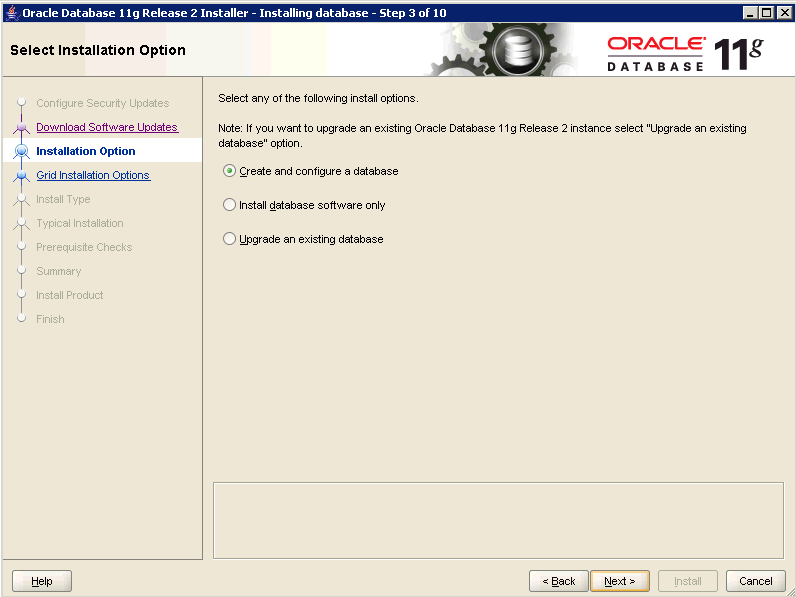
On the Select Installation Option page, choose Create and configure a database.
Note:
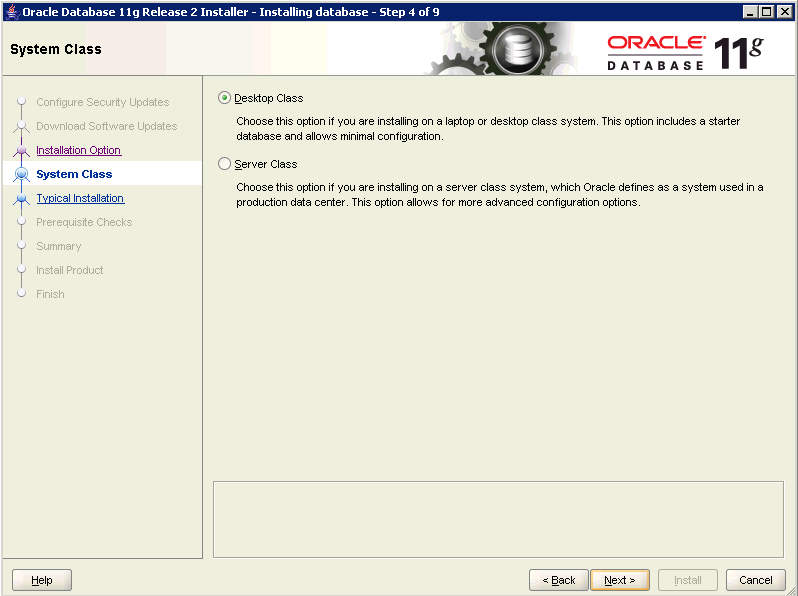
If you choose Install database software only instead of Create and configure a database, you may choose which database options you want to include in the installation. If you do not choose the Data Mining option during installation, you can enable it later. See "Enable or Disable the Data Mining Option" for instructions.On the System Class page, choose Desktop Class then Next.
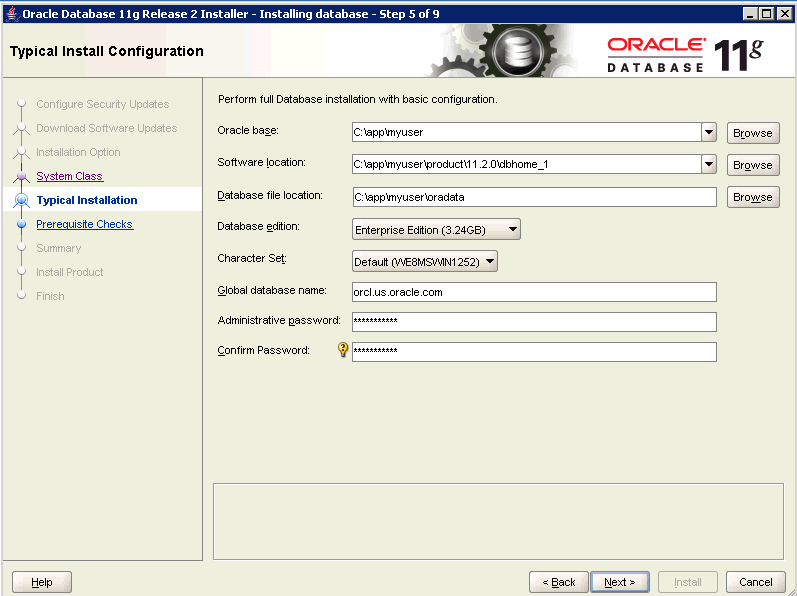
On the Typical Install Configuration page, specify the following information about the installation:
Oracle Base — Specify a base directory for Oracle products on this computer. If this directory does not exist, the Installer will create it.
Oracle base is the root of the Oracle directory tree. It may contain multiple Oracle home directories. By convention, Oracle base is referred to as ORACLE_BASE. (See "Conventions" for more information.)
Software Location — The Installer provides a Software Location under ORACLE_BASE. This will be the home directory for this installation of Oracle Database. If this directory does not exist, the Installer will create it. If the directory does exist, make sure that it is empty.
By convention, Oracle home is referred to as ORACLE_BASE\ORACLE_HOME. (See "Conventions" for more information.)
Database File Location — The Installer provides a Database File Location under ORACLE_BASE. This directory will hold the data files for the starter database. If this directory does not exist, the Installer will create it. If the directory does exist, make sure that it is empty.
Global Database Name — Specify a unique name for the starter database.
The Global Database name is the fully–qualified name of the database: for example, dbname.us.oracle.com. Specify a unique name for dbname that is not more than eight characters.
Administrative Password — Specify a password for the database system accounts SYS and SYSTEM. The password should have at least eight characters and include both alphabetic and numeric characters.
You will have the opportunity to change the passwords at a later time.
Confirm Password — Re–enter the administrative password.
Note:
To obtain information about any of the items on this page, drag the cursor from right to left over the item. A tooltip that describes the item will appear.After you have provided the information, click Next.
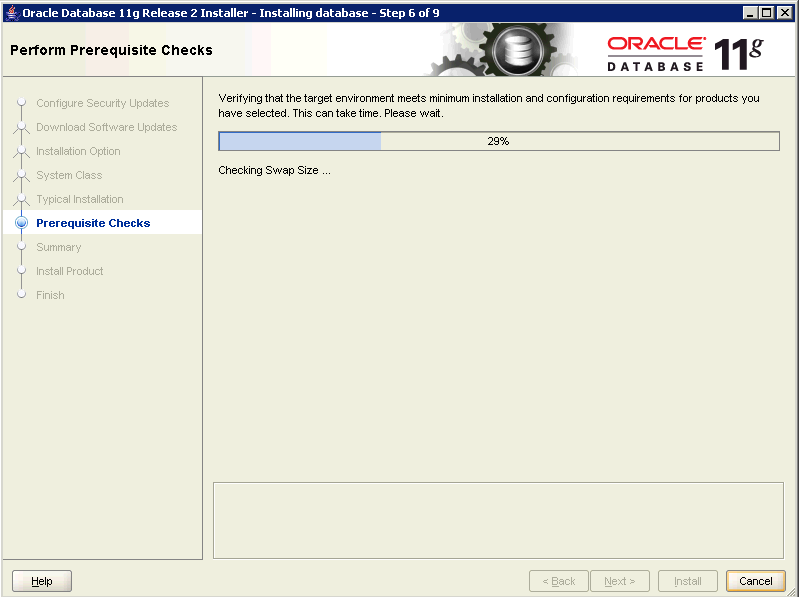
The Installer analyzes your computer to determine if you have the resources needed for the installation. If the prerequisite checks are successful, click Next. If not, click Fix and Check Again.
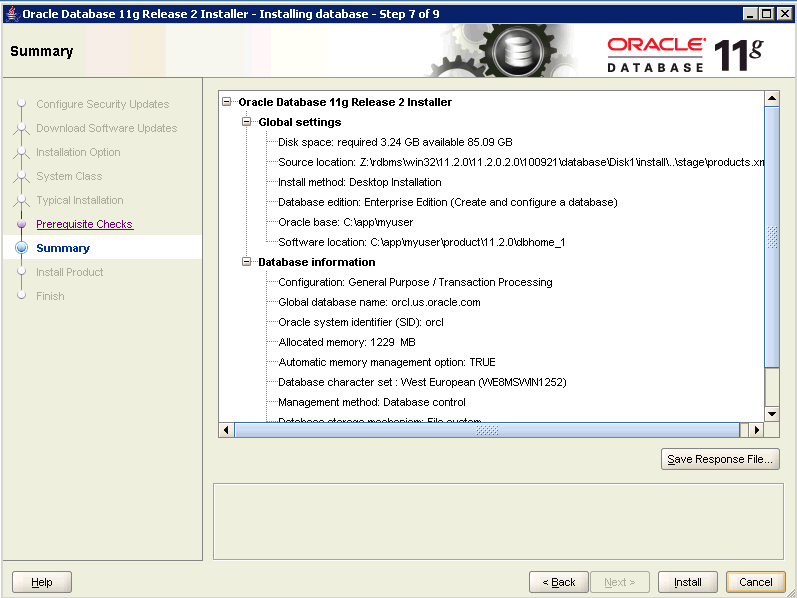
On the Summary page, click Install.
The Install Product page displays the progress of the installation.
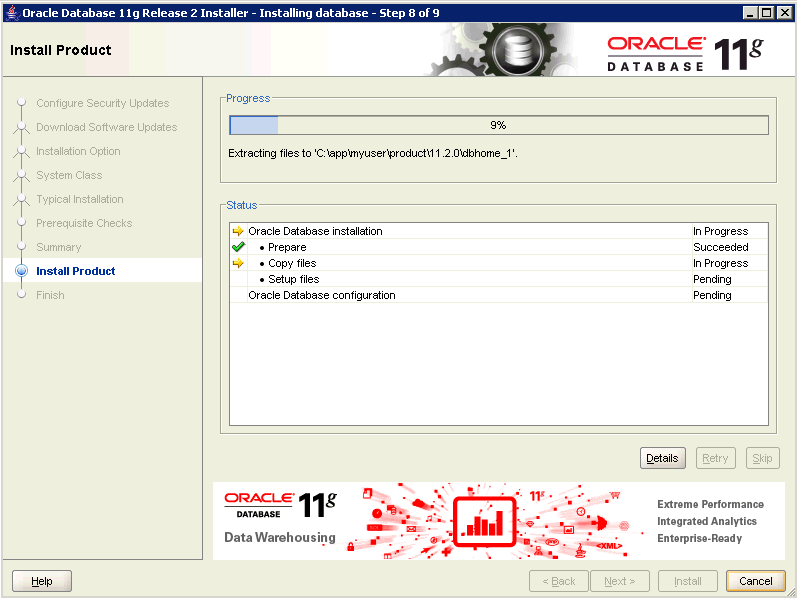
Once the software has been copied to your computer, the Database Configuration Assistant creates and starts the starter database.
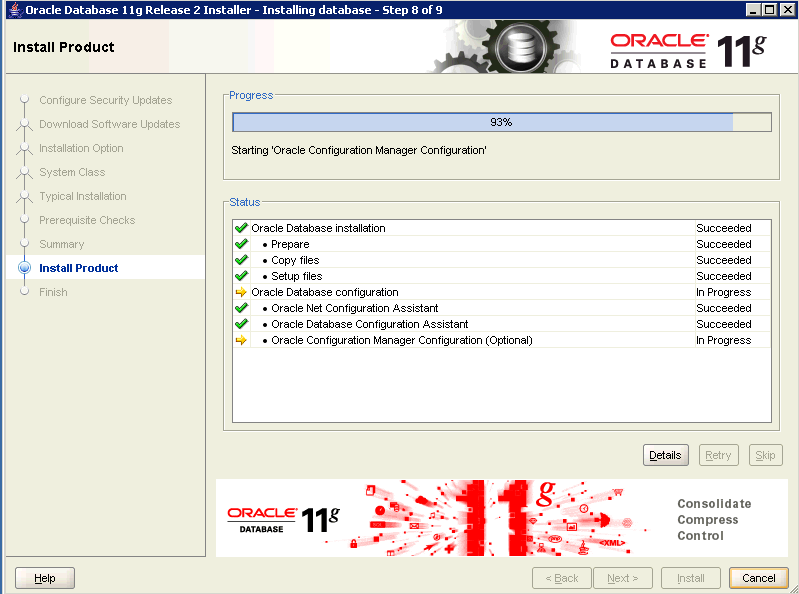
The Database Configuration Assistant displays summary information about the starter database.
At the bottom of the page is a note about passwords for the starter database. Choose Password Management if you wish to reset the administrative passwords or unlock any other accounts that are available in the database. By default the SYS and SYSTEM accounts are unlocked.
Note:
If you wish to use Oracle sample data or the Oracle Data Mining sample programs, unlock theSH account.
See Chapter 7 for information about the sample programs.
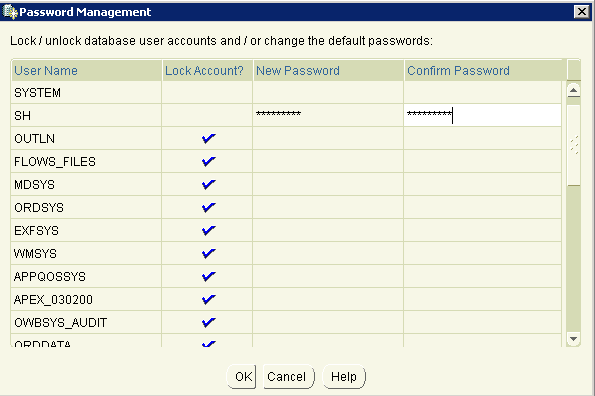
Click OK to return to the Database Configuration Assistant page. Click OK to return to Oracle Universal Installer.
On the Finish page, click Close.
Now the database is running and ready to accept connections.
If you stopped any Oracle services before running Oracle Universal Installer, you can restart them at this time.
In Windows Control Panel, choose Administrative Tools, then Services. Find the service names that start with "Oracle". Choose Start for each one.
Note:
To restart an Oracle database, first restart the listener (OracleOraDb11g_homeTNSListener), then restart the database service (OracleServiceservice_name).If you wish to verify that Oracle Data Mining is present and functioning properly in the database, you can execute a few simple commands at the SQL command line. A set of commands is provided for this purpose in Appendix A.
You can perform this verification without installing or downloading any additional software.
The Data Mining option is enabled by default during installation of Oracle Database. However, if you install the database software without creating a database, you can choose to disable database options. (See step 6 of Install Oracle Database.)
If you wish to enable or disable a database option for an Oracle home, you can use the command-line utility chopt.
chopt [ enable | disable ] db_option_name
To enable or disable the Data Mining option, specify dm as db_option_name.
To enable the Data Mining option:
Shut down the database.
srvctl stop database -d db_name
Stop the database service, OracleServiceSID, using the Services program in Control Panel.
Execute these commands.
cd %ORACLE_HOME%/bin
chopt enable dm
Start the database service, Oracle ServiceSID, using the Services program in Control Panel.
Start up the database.
srvctl start database -d db_name
To disable the Data Mining option:
Shut down the database.
srvctl stop database -d db_name
Stop the database service, OracleServiceSID, using the Services program in Control Panel.
Execute these commands.
cd %ORACLE_HOME%/bin
chopt disable dm
Start the database service, Oracle ServiceSID, using the Services program in Control Panel.
Start up the database.
srvctl start database -d db_name
The Data Mining sample programs are installed with Oracle Database Examples. The installation process copies the Data Mining sample programs, along with examples and demonstrations of other database features, to the \RDBMS\demo subdirectory of Oracle home.
Note:
You only need to install Oracle Database Examples if you wish to use the sample programs. If you do not wish to install the sample programs, you can skip this section.See Also:
Oracle Database Examples Installation Guide for complete installation instructions
Chapter 7 for information about the Oracle Data Mining sample programs
To install Database Examples, perform these steps:
Ensure that your computer meets the system requirements described in Oracle Database Examples Installation Guide.
Stop any Oracle services that may be running on your computer.
In Windows Control Panel, choose Administrative Tools, then Services. Find the service names that start with "Oracle". Choose Stop for each one.
Note:
To stop an Oracle database, first stop the database service (OracleServiceservice_name), then stop the database listener (OracleOraDb11g_homeTNSListener).To start the installation, go to the Examples installation directory and run SETUP.EXE.
Oracle Universal Installer displays the Specify Install Location page. Specify the Oracle base and Oracle home provided in the database software installation (step 8).
Do not assume that the directories displayed by the Installer are correct.
Click Next.
Oracle Data Miner is a graphical tool for developing data mining models within Oracle Database. You can deploy the models from within Oracle Data Miner or from SQL or Java. You can use the Oracle Data Miner Code Generators to capture data mining activities as code for deployment in external applications.
Note:
The following sections pertain to Oracle Data Miner Classic. For information about the new release of Oracle Data Miner, go to:http://www.oracle.com/technetwork/database/options/odm/dataminerworkflow-168677.html
Oracle Data Miner requires the following:
Access to an instance of Oracle Database with the Data Mining option.
A user ID with the privileges described in Chapter 4.
Java JDK version 1.5 or greater.
To check the version of Java on your system, you can execute the following at the command prompt:
> java -version
SQL*Loader is required if you wish to import data from text files. SQL*Loader is installed with Oracle Client. See Chapter 3.
To install Oracle Data Miner:
Ensure that your system meets the requirements described in "Data Miner: Requirements".
Go to the Oracle Data Miner page on the Oracle Technology Network:
http://www.oracle.com/technetwork/database/options/odm/downloads/index.html
You will find the following available for download:
Oracle Data Miner
Oracle Data Miner Tutorial
Oracle Data Miner PL/SQL Code Generator for JDeveloper
Oracle Data Miner PL/SQL Code Generator for SQL Developer
Download Oracle Data Miner and unzip to a new, empty directory. The zip file includes a readme.
If you wish to use the tutorial, download and unzip the file. The zip file includes sample data, a readme, and the tutorial PDF.
If you wish to use the code generators, follow the installation instructions in the Oracle Data Miner readme.
Navigate to the bin subdirectory of the Oracle Data Miner installation directory.
Double click odminerw.exe to launch Oracle Data Miner.
Note:
The first time you start Oracle Data Miner, you will be prompted to provide the path to the Java executable. Specify the full path ofjdk\bin\java.exe under Oracle home.
For the installation described in "Install Oracle Database", the path would be:
C:\app\myuser\product\11.2.0\dbhome_1\jdk\bin\java.exe
Note:
Theodminer.exe executable, also in the bin subdirectory, displays a console window that can be used for troublshooting.Follow the instructions in "Connect Oracle Data Miner".
The Oracle Spreadsheet Add–In for Predictive Analytics adds predictive analytics features to Microsoft Excel. Using simple "one click" data mining for PREDICT, EXPLAIN, PROFILE, and EXPORT/IMPORT operations, you can mine data stored in Excel or in Oracle Database.
Predictive analytics provides automated methodologies that simplify data mining.
See Also:
Oracle Data Mining Concepts for information about Oracle predictive analyticsThe Spreadsheet Add-In requires the following:
Access to an instance of Oracle Database installed with the Data Mining option.
A user ID with the privileges described in Chapter 4.
Microsoft Excel 2000 or later.
Oracle Objects for OLE and Oracle Net Configuration Assistant.
To obtain these components, Oracle Client must be present on the computer where Excel and the Spreadsheet Add–In are installed. For Oracle Client installation instructions, see Chapter 3.
An Oracle Net Service Name for the database connection. Instructions for creating an Oracle Net Service Name are provided in Chapter 3.
To install Oracle Spreadsheet Add–In for Predictive Analytics:
Ensure that your system meets the requirements described in "Spreadsheet Add–In: Requirements".
Download the Spreadsheet Add–In from the Oracle Data Mining Web site at http://www.oracle.com/technetwork/database/options/odm/odm-pred-analytics-addin-092973.html.
Open the zip file and extract the files to the Microsoft Office Library directory, which has a path such as this one:
C:\Program Files\Microsoft Office\Office\Library
The zip file contains the following files:
Predictive_Analytics.xla if you have Microsoft Excel 2000, 2002, or 2003
Predictive_Analytics_2007.xla if you have Microsoft Excel 2007
PAhelp.chm, the help file for the Spreadsheet Add–In
A readme (which you can copy to the directory of your choosing).
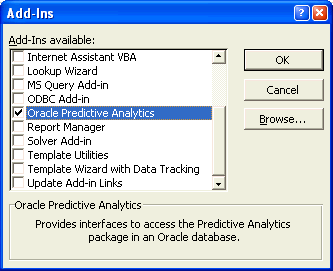
Open Excel and click Tools > Add–Ins. Select Oracle Predictive Analytics from the Add–Ins dialog box.
Note:
If the Spreadsheet Add–In was previously installed on your computer, uncheck Oracle Predictive Analytics and click OK to close the Add–Ins dialog. Then reopen the dialog and check the Oracle Predictive Analytics box.The OraclePA menu is added to the Excel toolbar.
Although the Add–In may use data stored in Excel or in Oracle Database, a connection to Oracle Database is required. For instructions, see "Connect the Spreadsheet Add–In".
Although the Spreadsheet Add–In may use data stored in Excel or in Oracle Database, a connection to Oracle Database is always required. Once you have created the connection, you can use the PREDICT, EXPLAIN, PROFILE, and export/import operations provided by the Add–In.
To create the connection and install the Add–In in Excel, follow the instructions in "Connect the Spreadsheet Add–In".
Note:
The first time you use the Add–In, you will be prompted to provide the path to the Java executable. Specify the full path ofjdk\bin\java.exe under Oracle home.
For the installation described in "Install Oracle Database", the path would be:
C:\app\myuser\product\11.2.0\dbhome_1\jdk\bin\java.exe