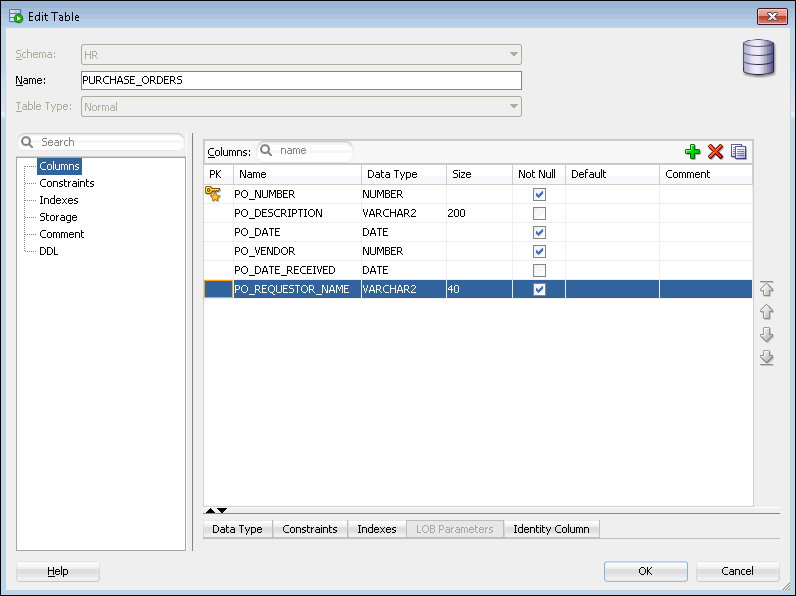
Example: Adding Table Columns

In this example, you use SQL Developer to add columns to the purchase_orders table that you created previously in "Example: Creating a Table". The two new columns are named po_date_received and po_requestor_name.

To add columns to the PURCHASE_ORDERS table:

  1. In SQL Developer, navigate to the Tables node in the HR schema, following the instructions in "Viewing Tables".
  2. Expand the Tables node.

    The list of tables in the schema appears.

  3. Right-click the PURCHASE_ORDERS table and select Edit.

    The Edit Table dialog box appears.

  4. At the top right of the Columns section, click the green plus sign icon.

    A new blank column appears at the bottom of the list of columns.

  5. In the Columns section, enter the following information about the new po_date_received column:

    Field Name Value

    Name

    PO_DATE_RECEIVED

    Type

    DATE


  6. At the top right of the Columns section, click the green plus sign icon again.

    A new blank column appears at the bottom of the list of columns.

  7. In the Column Properties section, enter the following information about the new po_requestor_name column:

    Field Name Value

    Name

    PO_REQUESTOR_NAME

    Type

    VARCHAR2

    Size

    40


  8. Click OK.

    The PURCHASE_ORDERS table appears under the Tables node in the Connections navigator.

  9. To view the new columns, click PURCHASE_ORDERS in the Connections navigator. Then, on the PURCHASE_ORDERS tab in the objects pane, click the Columns subtab to view the new columns.

See Also:

" About Tables"