Example: Creating a View
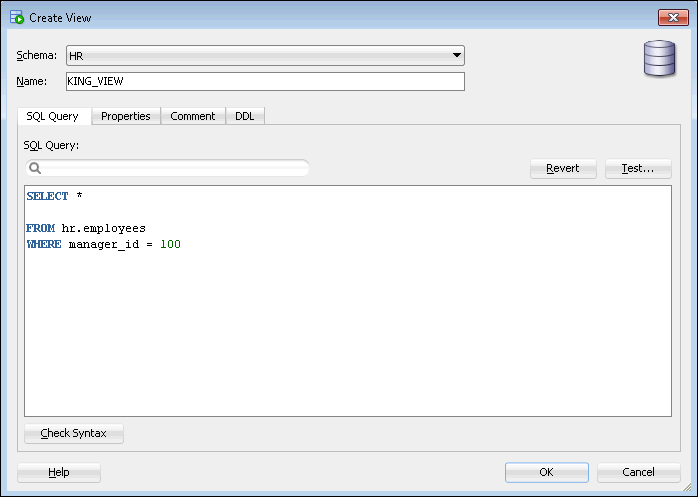
In this example, you use SQL Developer to create a view named king_view, which uses the HR.EMPLOYEES table as its base table. (The HR schema is part of the sample schemas.) This view filters the table data so that only employees who report directly to the manager King, whose employee ID is 100, are returned in queries. In an application scenario, this view adds an additional level of security to the HR.EMPLOYEES table while providing a suitable presentation of relevant information for manager King.
To create the KING_VIEW view on the HR.EMPLOYEES table:
-
In the Connections navigator in SQL Developer, navigate to the Views node in the HR schema, by following the instructions in "Displaying Views".
-
Right-click the Views node and select New View.
The Create View dialog box appears, with the SQL Query tab displayed.
-
Enter the following information:
-
In the Schema field, select
HR. -
In the Name field, enter
KING_VIEW. -
In the SQL Query field, enter the following SQL statement that will be used to create
KING_VIEW:SELECT * FROM hr.employees WHERE manager_id = 100
-
-
Click OK.
The
KING_VIEWis created and appears in the list of views for the HR schema.
To test the new KING_VIEW view:
See Also:
