12 Real Application Security HR Demo
This chapter describes the following topics:
Overview of the Security HR Demo
This Human Resources (HR) Demonstration shows how to use basic Real Application Security (RAS) features. This tutorial is an end-to-end use case scenario. PL/SQL scripts, a Java program source file, and log files can be found in Appendix C.
The HR demo secures the HR.EMPLOYEE table by applying a data security policy that has three realms:
-
An employee's own record realm. The ACL,
EMP_ACLcontrols this realm, which grants application roleEMP_ROLEprivileges to access the realm, including theSALARYcolumn. -
All the records in the IT department realm. The ACL,
IT_ACLcontrols this realm, which grants application roleIT_ROLEprivileges to access the realm, but excluding theSALARYcolumn. -
All the employee records realm. The ACL, HR_ACL controls this realm, which grants application role
HR_ROLEprivileges to access the realm, including theSALARYcolumn.
The HR Demo defines two application users to demonstrate the effects of the policy:
-
DAUSTIN, an application user in the IT department. He has application rolesEMP_ROLEandIT_ROLE. So, he can access realm #1 and realm #2 mentioned previously; that is, he can view employee records in the IT department, but he cannot view theSALARYcolumn, except for his own salary record. -
SMAVRIS, an application user in HR department. She has application rolesEMP_ROLEandHR_ROLE. So, she can access realm #1 and realm #3 mentioned previously; that is, she can view and update all the employee records.
The HR Demo scripts show:
-
How to create Real Application Security objects: application user, application role, ACL, security class, and data security policy.
-
How to use the data security policy to secure rows (using realm constraints) and columns (using a column constraint) of a table.
-
How to directly logon to a database with application users (requiring a password), and how to create, attach, detach, and destroy a Real Application Security session.
-
How to enable and disable an application role in a Real Application Security session.
What Each Script Does
The Security HR demo use case runs the following set of PL/SQL scripts to set up components and run the demo:
-
hrdemo_setup.sql: sets up the demo components by:-
Creating a database user as the Real Application Security Administrator and then connecting as the Real Application Security Administrator to create the components.
-
Creating a database role,
DB_EMP. -
Creating an IT application user,
DAUSTIN. -
Creating an HR application user,
SMAVRIS. -
Creating application roles:
EMP_ROLE,IT_ROLE, andHR_ROLE, and then granting the database roleDB_EMPto each of these application roles. -
Granting application roles
EMP_ROLEandIT_ROLEto application userDAUSTIN. -
Granting application roles
EMP_ROLEandHR_ROLEto application userSMAVRIS. -
Creating the
VIEW_SALARYprivilege and creating theHRPRIVSsecurity class in which to scope the privilege. -
Creating three ACLs:
EMP_ACL,IT_ACL, andHR_ACL, in which:-
EMP_ACLgrants theEMP_ROLEtheSELECTdatabase privilege andVIEW_SALARYapplication privilege to view an employee's own record, including theSALARYcolumn. -
IT_ACLgrants theIT_ROLEonly theSELECTdatabase privilege to view the employee records in the IT department, but it does not grant theVIEW_SALARYprivilege that is required for access to theSALARYcolumn. -
HR_ACLgrants theHR_ROLEALLprivileges, which means all the privileges in the ACL's security class. In this case,ALLprivileges includesSELECT,INSERT,UPDATE, andDELETEdatabase privileges to view and update all employee's records, and granting theVIEW_SALARYapplication privilege to view theSALARYcolumn.
-
-
The HR demo secures the
HR.EMPLOYEEtable by creating and applying the data security policy,EMPLOYEES_DS, that has the following three realms and column constraint:-
An employee's own record realm. The ACL,
EMP_ACLcontrols this realm, which grants application roleEMP_ROLEprivileges to access the realm, including theSALARYcolumn. -
All the records in the IT department realm. The ACL,
IT_ACLcontrols this realm, which grants application roleIT_ROLEprivileges to access the realm, but excluding theSALARYcolumn. -
All the employee records realm. The ACL,
HR_ACLcontrols this realm, which grants application roleHR_ROLEprivileges to access the realm, including theSALARYcolumn. -
A column constraint that protects the
SALARYcolumn by requiring theVIEW_SALARYprivilege to view its sensitive data.
-
-
Validating all the objects that have been created to ensure that all configurations are correct.
-
Setting up the mid-tier related configuration by creating a
DISPATCHERuser, setting the password for this user, and granting the administrative roles,xscacheadminandxssessionadminto thisDISPATCHERuser.
-
-
hrdemo_run.sql: runs the demo with direct logon, demonstrating:-
That the IT application user,
DAUSTIN, can view the records in the IT department, but can only view his own salary record, and cannot update his own record. -
That the HR application user,
SMAVRIS, can view all the records, including all salary rows in theSALARYcolumn, and can update any record.
-
-
hrdemo_run_sess.sql: runs the demo creating and attaching to a Real Application Security session, demonstrating:-
Connecting as the Real Application Security Administrator and creating an application session for application user
SMAVRISand attaching to it. -
Displaying the current user as
SMAVRIS. -
Displaying the enabled database roles as
DB_EMPand application roles asEMP_ROLE,HR_ROLE, andXSPUBLICfor the current userSMAVRIS. -
That
SMAVRISapplication user can view all records including all salary rows in theSALARYcolumn. -
Disabling the
HR_ROLEand thus limiting application userSMAVRISto viewing only her own employee record. -
Enabling the
HR_ROLE, thus allowingSMAVRISapplication user to view all records, including all salary rows in theSALARYcolumn again. -
Detaching from the application session.
-
Destroying the application session.
-
-
hrdemo_clean.sql: performs a cleanup operation that removes: application roles, application users, ACLs, the data security policy, the database role, the Real Application Security administrative user, and the mid-tier dispatcher user. -
HRDemo.java: runs the HR Demo using the Java interface.
"Setting Up the Security HR Demo Components" describes in more detail how each of the Real Application Security components is created along with performing some other important tasks.
Setting Up the Security HR Demo Components
Before you can create Real Application Security components, you must first create a database user as the Real Application Security Administrator, grant this administrator dba and xs_session_admin privileges, and then connect to the database as the Real Application Security Administrator.
connect sys/password as sysdba
grant dba, xs_session_admin to rasadm identified by rasadm;
connect rasadm/rasadm;
Create Roles and Application Users
Create the database role DB_EMP and grant this role the necessary table privileges. This role is used to grant the required object privileges to application users.
create role db_emp;
grant select, insert, update, delete on hr.employees to db_emp;
Create the application role EMP_ROLE for common employees.
exec sys.xs_principal.create_role(name => 'emp_role', enabled => true);
Create an application role IT_ROLE for the IT department.
exec sys.xs_principal.create_role(name => 'it_role', enabled => true);
Create an application role HR_ROLE for the HR department.
exec sys.xs_principal.create_role(name => 'hr_role', enabled => true);
Grant the DB_EMP database role to the three application roles, so they each have the required object privilege to access the table.
grant db_emp to emp_role;
grant db_emp to it_role;
grant db_emp to hr_role;
Create the application users.
Create application user DAUSTIN (in the IT department) and grant this user application roles EMP_ROLE and IT_ROLE.
exec  sys.xs_principal.create_user(name => 'daustin', schema => 'hr');
exec  sys.xs_principal.set_password('daustin', 'welcome1');
exec  sys.xs_principal.grant_roles('daustin', 'emp_role');
exec  sys.xs_principal.grant_roles('daustin', 'it_role');
Create application user SMAVRIS (in the HR department) and grant this user application roles EMP_ROLE and HR_ROLE.
exec  sys.xs_principal.create_user(name => 'smavris', schema => 'hr');
exec  sys.xs_principal.set_password('smavris', 'welcome1');
exec  sys.xs_principal.grant_roles('smavris', 'emp_role');
exec  sys.xs_principal.grant_roles('smavris', 'hr_role');
Create the Security Class and ACLs
Create a security class HRPRIVS based on the predefined DML security class. HRPRIVS has a new privilege VIEW_SALARY, which controls access to the SALARY column.
declare
begin
  sys.xs_security_class.create_security_class(
    name        => 'hrprivs',
    parent_list => xs$name_list('sys.dml'),
    priv_list   => xs$privilege_list(xs$privilege('view_salary')));
end;
/
Create three ACLs, EMP_ACL, IT_ACL, and HR_ACL to grant privileges for the data security policy to be defined later.
declare
  aces xs$ace_list := xs$ace_list();
begin
  aces.extend(1);

  -- EMP_ACL: This ACL grants EMP_ROLE the privileges to view an employee's
  --          own record including SALARY column.
  aces(1) := xs$ace_type(privilege_list => xs$name_list('select','view_salary'),
                         principal_name => 'emp_role');

  sys.xs_acl.create_acl(name      => 'emp_acl',
                    ace_list  => aces,
                    sec_class => 'hrprivs');

  -- IT_ACL:  This ACL grants IT_ROLE the privilege to view the employee
  --          records in IT department, but it does not grant the VIEW_SALARY
  --          privilege that is required for access to SALARY column.
  aces(1) := xs$ace_type(privilege_list => xs$name_list('select'),
                         principal_name => 'it_role');

  sys.xs_acl.create_acl(name      => 'it_acl',
                    ace_list  => aces,
                    sec_class => 'hrprivs');

  -- HR_ACL:  This ACL grants HR_ROLE the privileges to view and update all
  --          employees' records including SALARY column.
  aces(1):= xs$ace_type(privilege_list => xs$name_list('select', 'insert',
                                          'update', 'delete', 'view_salary'),
                        principal_name => 'hr_role');

  sys.xs_acl.create_acl(name      => 'hr_acl',
                    ace_list  => aces,
                    sec_class => 'hrprivs');
end;
/
Create the Data Security Policy
Create data security policy for the EMPLOYEE table. The policy defines three realm constraints and a column constraint that protects the SALARY column.
declare
  realms   xs$realm_constraint_list := xs$realm_constraint_list();
  cols     xs$column_constraint_list := xs$column_constraint_list();
begin
  realms.extend(3);

  -- Realm #1: Only the employee's own record.
  --           EMP_ROLE can view the realm including SALARY column.
  realms(1) := xs$realm_constraint_type(
    realm    => 'email = xs_sys_context(''xs$session'',''username'')',
    acl_list => xs$name_list('emp_acl'));

  -- Realm #2: The records in the IT department.
  --           IT_ROLE can view the realm excluding SALARY column.
  realms(2) := xs$realm_constraint_type(
    realm    => 'department_id = 60',
    acl_list => xs$name_list('it_acl'));

  -- Realm #3: All the records.
  --           HR_ROLE can view and update the realm including SALARY column.
  realms(3) := xs$realm_constraint_type(
    realm    => '1 = 1',
    acl_list => xs$name_list('hr_acl'));

  -- Column constraint protects SALARY column by requiring VIEW_SALARY
  -- privilege.
  cols.extend(1);
  cols(1) := xs$column_constraint_type(
    column_list => xs$list('salary'),
    privilege   => 'view_salary');

  sys.xs_data_security.create_policy(
    name                   => 'employees_ds',
    realm_constraint_list  => realms,
    column_constraint_list => cols);
end;
/
Apply the data security policy to the EMPLOYEES table.
begin
  sys.xs_data_security.apply_object_policy(
    policy => 'employees_ds',
    schema => 'hr',
    object =>'employees');
end;
/
Validate the Real Application Security Objects
After you create these Real Application Security objects, validate them to ensure they are all properly configured.
begin
  if (sys.xs_diag.validate_workspace()) then
    dbms_output.put_line('All configurations are correct.');
  else
    dbms_output.put_line('Some configurations are incorrect.');
  end if;
end;
/
-- XS$VALIDATION_TABLE contains validation errors if any.
-- Expect no rows selected.
select * from xs$validation_table order by 1, 2, 3, 4;
Set up the Mid-Tier Related Configuration
Set up the mid-tier configuration to be used later. This involves creating a DISPATCHER user and password and granting this user the xscacfeadmin and xsessionadmin Real Application Security administrator privileges.
exec sys.xs_principal.create_user(name=>'dispatcher', schema=>'HR');
exec sys.xs_principal.set_password('dispatcher', 'welcome1');

exec sys.xs_principal.grant_roles('dispatcher', 'xscacheadmin');
exec sys.xs_principal.grant_roles('dispatcher', 'xssessionadmin');
Running the Security HR Demo Using Direct Logon
To run the HR Demo, first connect as application user DAUSTIN, who has only the EMP_ROLE and IT_ROLE application roles.
conn daustin/welcome1;
Customize how secured column values are to be displayed in SQL*Plus using the default indicator asterisks (*******) in place of column values.
SET SECUREDCOL ON UNAUTH *******
Perform a query to show that application user DAUSTIN can view the records in the IT department, but can only view his own SALARY column.
select email, first_name, last_name, department_id, manager_id, salary
from employees order by email;

SQL> select email, first_name, last_name, department_id, manager_id, salary
  2  from employees order by email;

EMAIL      FIRST_NAME      LAST_NAME       DEPARTMENT_ID MANAGER_ID  SALARY
---------- --------------- --------------- ------------- ---------- -------
AHUNOLD    Alexander       Hunold                     60        102 *******
BERNST     Bruce           Ernst                      60        103 *******
DAUSTIN    David           Austin                     60        103    4800
DLORENTZ   Diana           Lorentz                    60        103 *******
VPATABAL   Valli           Pataballa                  60        103 *******

5 rows selected.
Set to the default display for how secured column values are to be displayed in SQL*Plus by displaying null values in place of column values for application users without authorization, and in place of column values where the security level is unknown.
SET SECUREDCOL OFF
Perform an update operation to show that application user is not authorized to update the record.
update employees set manager_id = 102 where email = 'DAUSTIN';

SQL> update employees set manager_id = 102 where email = 'DAUSTIN';

0 rows updated.
Perform a query to show that the record is unchanged.
select email, first_name, last_name, department_id, manager_id, salary
from employees where email = 'DAUSTIN';

SQL> select email, first_name, last_name, department_id, manager_id, salary
  2  from employees where email = 'DAUSTIN';

EMAIL      FIRST_NAME      LAST_NAME       DEPARTMENT_ID MANAGER_ID  SALARY
---------- --------------- --------------- ------------- ---------- -------
DAUSTIN    David           Austin                     60        103    4800

1 row selected.
Connect as application user SMAVRIS, who has both EMP_ROLE and HR_ROLE roles.
conn smavris/welcome1;
Perform a query to show that application user SMAVRIS can view all the records including SALARY column.
select email, first_name, last_name, department_id, manager_id, salary
from employees where department_id = 60 or department_id = 40
order by department_id, email;

SQL> select email, first_name, last_name, department_id, manager_id, salary
  2  from employees where department_id = 60 or department_id = 40
  3  order by department_id, email;

EMAIL      FIRST_NAME      LAST_NAME       DEPARTMENT_ID MANAGER_ID  SALARY
---------- --------------- --------------- ------------- ---------- -------
SMAVRIS    Susan           Mavris                     40        101    6500
AHUNOLD    Alexander       Hunold                     60        102    9000
BERNST     Bruce           Ernst                      60        103    6000
DAUSTIN    David           Austin                     60        103    4800
DLORENTZ   Diana           Lorentz                    60        103    4200
VPATABAL   Valli           Pataballa                  60        103    4800

6 rows selected.
Perform a query to show that application user SMAVRIS can access all the records.
select count(*) from employees;

SQL> select count(*) from employees;

  COUNT(*)
----------
       107

1 row selected.
Perform an update of the record to show that application user SMAVRIS can update the record.
update employees set manager_id = 102 where email = 'DAUSTIN';

SQL> update employees set manager_id = 102 where email = 'DAUSTIN';

1 row updated.
Perform a query to show that the record is changed.
select email, first_name, last_name, department_id, manager_id, salary
from employees where email = 'DAUSTIN';

SQL> select email, first_name, last_name, department_id, manager_id, salary
  2  from employees where email = 'DAUSTIN';

EMAIL      FIRST_NAME      LAST_NAME       DEPARTMENT_ID MANAGER_ID  SALARY
---------- --------------- --------------- ------------- ---------- -------
DAUSTIN    David           Austin                     60        102    4800

1 row selected.
Update the record to change it back to its original state.
update employees set manager_id = 103 where email = 'DAUSTIN';

SQL> update employees set manager_id = 103 where email = 'DAUSTIN';

1 row updated.
Running the Security HR Demo Attached to a Real Application Security Session
To run the demo attached to a Real Application Security session, the Real Application Security administrator must first create the session for an application user and attach to it. In the process, create a variable to remember the session ID.
connect rasadm/rasadm;

var gsessionid varchar2(32);

declare
  sessionid raw(16);
begin
  sys.dbms_xs_sessions.create_session('SMAVRIS', sessionid);
  :gsessionid := rawtohex(sessionid);
  sys.dbms_xs_sessions.attach_session(sessionid, null);
end ;
/
Display the current user.
select xs_sys_context('xs$session','username') from dual;

SQL> select xs_sys_context('xs$session','username') from dual;

XS_SYS_CONTEXT('XS$SESSION','USERNAME')
--------------------------------------------------------------------------------
SMAVRIS

1 row selected.
Display the enabled database and application roles for the current application user.
select role_name from v$xs_session_roles union
select role from session_roles order by 1;

SQL> select role_name from v$xs_session_roles union
  2  select role from session_roles order by 1;

ROLE_NAME
--------------------------------------------------------------------------------
DB_EMP
EMP_ROLE
HR_ROLE
XSPUBLIC

4 rows selected.
Perform a query to show that application user SMAVRIS can view all the records including SALARY column.
select email, first_name, last_name, department_id, manager_id, salary
from employees where department_id = 60 or department_id = 40
order by department_id, email;

SQL> select email, first_name, last_name, department_id, manager_id, salary
  2  from employees where department_id = 60 or department_id = 40
  3  order by department_id, email;

EMAIL      FIRST_NAME      LAST_NAME       DEPARTMENT_ID MANAGER_ID  SALARY
---------- --------------- --------------- ------------- ---------- -------
SMAVRIS    Susan           Mavris                     40        101    6500
AHUNOLD    Alexander       Hunold                     60        102    9000
BERNST     Bruce           Ernst                      60        103    6000
DAUSTIN    David           Austin                     60        103    4800
DLORENTZ   Diana           Lorentz                    60        103    4200
VPATABAL   Valli           Pataballa                  60        103    4800

6 rows selected.
Perform a query to show that application user SMAVRIS can access all the records.
select count(*) from employees;

SQL> select count(*) from employees;

  COUNT(*)
----------
       107

1 row selected.
Disable the HR_ROLE. This will limit application user SMAVRIS to only be able to see her own record.
exec sys.dbms_xs_sessions.disable_role('hr_role');
Perform a query
select email, first_name, last_name, department_id, manager_id, salary
from employees where department_id = 60 or department_id = 40
order by department_id, email;

SQL> select email, first_name, last_name, department_id, manager_id, salary
  2  from employees where department_id = 60 or department_id = 40
  3  order by department_id, email;

EMAIL      FIRST_NAME      LAST_NAME       DEPARTMENT_ID MANAGER_ID  SALARY
---------- --------------- --------------- ------------- ---------- -------
SMAVRIS    Susan           Mavris                     40        101    6500

1 row selected.
Enable the HR_ROLE so application user can view all the records including SALARY column.
exec sys.dbms_xs_sessions.enable_role('hr_role');
Perform a query to show that application user can view all the records including SALARY column.
select email, first_name, last_name, department_id, manager_id, salary
from employees where department_id = 60 or department_id = 40
order by department_id, email;

SQL> -- SMAVRIS can view all the records again.
SQL> select email, first_name, last_name, department_id, manager_id, salary
  2  from employees where department_id = 60 or department_id = 40
  3  order by department_id, email;

EMAIL      FIRST_NAME      LAST_NAME       DEPARTMENT_ID MANAGER_ID  SALARY
---------- --------------- --------------- ------------- ---------- -------
SMAVRIS    Susan           Mavris                     40        101    6500
AHUNOLD    Alexander       Hunold                     60        102    9000
BERNST     Bruce           Ernst                      60        103    6000
DAUSTIN    David           Austin                     60        103    4800
DLORENTZ   Diana           Lorentz                    60        103    4200
VPATABAL   Valli           Pataballa                  60        103    4800

6 rows selected.
Perform a query to show that application user SMAVRIS can access all the records.
select count(*) from employees;

SQL> select count(*) from employees;

  COUNT(*)
----------
       107

1 row selected.
Detach and destroy the application session.
declare
  sessionid raw(16);
begin
  sessionid := hextoraw(:gsessionid);
  sys.dbms_xs_sessions.detach_session;
  sys.dbms_xs_sessions.destroy_session(sessionid);
end;
/
Running the Security HR Demo Cleanup Script
After running the HR demo, you can run the clean up script to remove all of the Real Application Security components.
To start, connect as the Real Application Security Administrator and then begin removing components.
connect rasadm/rasadm;
Remove the data security policy from the EMPLOYEES table.
begin
  sys.xs_data_security.remove_object_policy(policy=>'employees_ds',
                                        schema=>'hr', object=>'employees');
end;
/
Delete the application roles and application users.
exec sys.xs_principal.delete_principal('emp_role', xs_admin_util.cascade_option);
exec sys.xs_principal.delete_principal('hr_role', xs_admin_util.cascade_option);
exec sys.xs_principal.delete_principal('it_role', xs_admin_util.cascade_option);
exec sys.xs_principal.delete_principal('smavris', xs_admin_util.cascade_option);
exec sys.xs_principal.delete_principal('daustin', xs_admin_util.cascade_option);
Delete the security class and the ACLs.
exec sys.xs_security_class.delete_security_class('hrprivs', xs_admin_util.cascade_option);
exec sys.xs_acl.delete_acl('emp_acl', xs_admin_util.cascade_option);
exec sys.xs_acl.delete_acl('it_acl', xs_admin_util.cascade_option);
exec sys.xs_acl.delete_acl('hr_acl', xs_admin_util.cascade_option);
Delete the data security policy.
exec sys.xs_data_security.delete_policy('employees_ds', xs_admin_util.cascade_option);
Delete the database role.
drop role db_emp;
Delete the Real Application Security Administrator.
connect sys/knl_test7 as sysdba
drop user rasadm;
Delete the DISPATCHER user used by the mid-tier.
exec xs_principal.delete_principal('dispatcher', xs_admin_util.cascade_option);
Running the Security HR Demo in the Java Interface
See "Output" for a description of the two queries that are returned from running the Security HR Demo in the Java interface.
Using RASADM to Run the Security HR Demo
Oracle Database Real Application Security Administration (RASADM) lets you create Real Application Security data security policies using a graphical user interface. For more information on installing and configuring RASADM, see Oracle Database Real Application Security Administration for more information.
This section describes the following topics:
Running the RASADM Application
To run the RASADM application, enter the following URL in your browser: https://www.example.com:8080/apex/f?p=rasadm.
This URL is just an example and the real URL is based on your current Application Express configuration. Make sure the correct URL is provided. Then log in as the RASADM administrator using the same password given during the installation.
Oracle recommends that you turn on HTTPS.
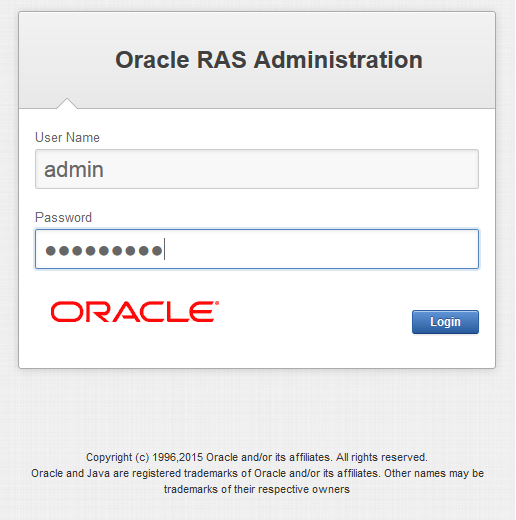
You can log in as the RASADM admin user or any user created after installation using the password given during installation as shown in Figure 12-1.
Figure 12-1 Oracle RAS Administration Login Page.
Description of "Figure 12-1 Oracle RAS Administration Login Page."
For More Information
See the following resources for more information:
-
Real Application Security discussion forum:
https://community.oracle.com/community/developer/english/oracle_database/database_security/database_security_-_general -
Real Application Security Documentation: see Oracle Database Real Application Security Administration
Design Phase
The design phase involves identifying all tasks an application performs that require application privileges to control data access. For example, during the design phase, the application policy designer must identify:
-
The set of application-level operations that require access control.
-
The rows and columns of tables and views that can be accessed as part of the application-level operations.
-
The set of actors or principals (users and roles) that can perform these operations.
-
The runtime application session attributes that identity rows of a table or views. These attribute names are used within the predicates that selects the rows to be authorized, and their values are set during the execution of the application.
Development Flow
In the development phase, as the RASADM administrator, you use RASADM to develop your data security policies following these steps:
-
Create the corresponding application users and roles. If using an external directory server, create the application users and roles or user groups in the directory server. Follow this procedure to create these principals natively in the database:
-
Create the application roles and grant application roles to application roles, if needed. See the topic on creating application roles.
-
Create the application users and grant application roles to the application users. See the topic on creating application users.
-
Configure the directory server to fetch the users and role, when principals from external stores are used. See the topic on configuration.
-
For users and roles in the external Directory Server, manage parameter settings for using RASADM with a Directory Server. See the topic on managing settings.
-
-
Create each privilege class that you plan to use to develop the security policies for your application. Each privilege class consists of one or more appropriate privileges that you define and can reference in an ACL and also grant them to the application users and application roles. Each privilege class authorizes by means of ACLs the required application-level operations of a data security policy. See the topic on creating application privilege classes.
-
Create one or more session namespaces that can be used across different application sessions. This consists of defining for a session namespace its set of properties (application attributes) and its associated access control policy or ACL that you can choose from a list or create. See the topic on creating namespaces.
-
Create the data security policy by associating each data realm with an ACL, so as to create both data realm authorization and column authorization as needed. This process consists of four parts:
-
Policy Information - You choose the object to be protected and the privilege class to protect it as well as specify the policy name and select the policy schema. See Step 3 in the topic on creating data security policies.
-
Column Level Authorization - You choose the name of the column to be protected and select the privilege to be granted to access the column, which is associated with the privilege class you selected in Step 3a. See Step 4 in the topic on creating data security policies.
-
Data Realm Authorization - You create a SQL predicate to represent the data realm to be protected and add each to a data realm grant list. Then you choose or create the ACL to protect the data realm. Next, create privilege grants to be added to a privilege grants list consisting of each principal and whether it is allowed authorization or denied authorization by selecting the appropriate privilege. See Step 5 in the topic on creating data security policies.
-
Apply Policy - You can apply, remove, enable, or disable the data security policy you are creating and choose to specify certain apply options, allowing the owner of the table or view to bypass this data security policy, and whether to enforce statement types for this policy. See Step 6 in the topic on creating data security policies.
-
Using RASADM to Create the HR Demo
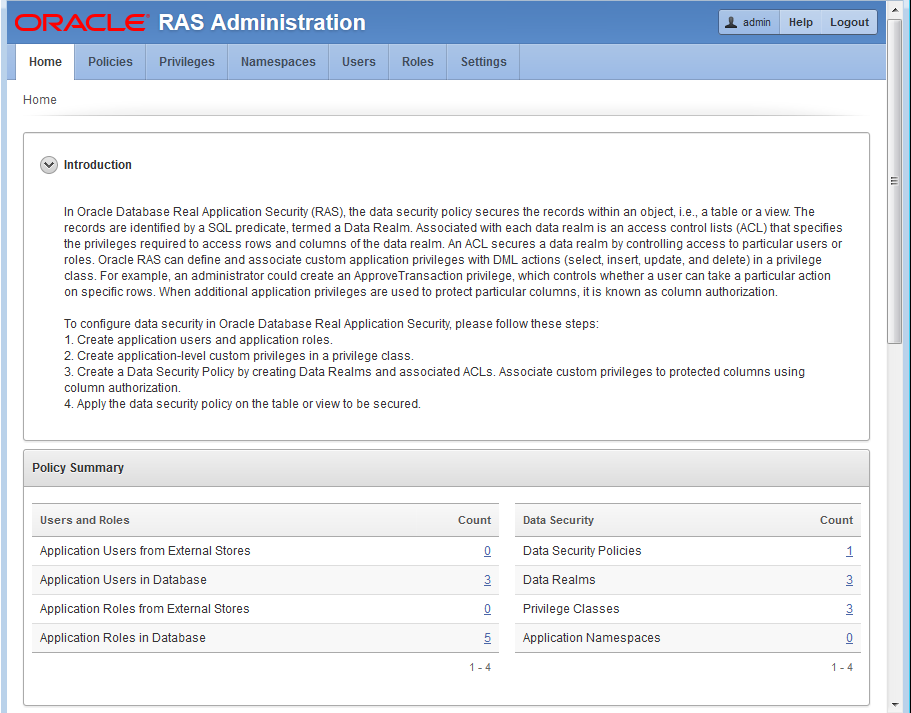
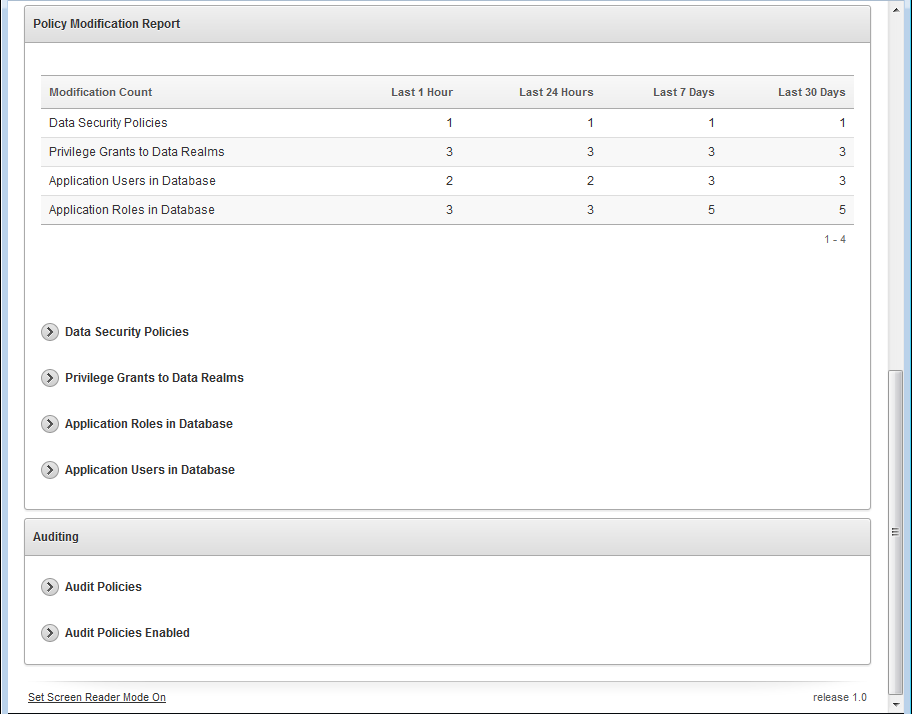
To begin, you should be running the RASADM application and be logged in as the ADMIN user as described in Running the RASADM Application and shown in Figure 12-2.
Figure 12-2 Oracle RAS Administration Home Page.
Description of "Figure 12-2 Oracle RAS Administration Home Page."
Description of "Figure 12-2 Oracle RAS Administration Home Page."
You will be performing the following tasks:
Creating Application Roles
You must create a database DP_EMP role using SQL*Plus and grant this role SELECT, INSERT, UPDATE, and DELETE privileges in HR.EMPLOYEES as this code snippet indicates.
-- Create database role DB_EMP and grant necessary table privileges.
-- This role will be used to grant the required object privileges to
-- application users.
CREATE ROLE DB_EMP;
GRANT SELECT, INSERT, UPDATE, DELETE ON HR.EMPLOYEES TO DB_EMP;
See "hrdemo_setup.sql" for more information.
This next task involves creating the following application roles: EMP_ROLE, IT_ROLE, and HR_ROLE, and then enabling each application role.
This task can be performed in one of two ways:
-
Using RASADM to create these application roles.
-
Using an external directory server to create the application roles in the directory server.
In either case, for the HR Demo, the following application roles will be created:
-
EMP_ROLE -
IT_ROLE -
HR_ROLE
Finally, using SQL*Plus, you must grant each of these application roles the database DB_EMP role as indicated in the following code snippet.
-- Grant DB_EMP to the three application roles, so they have the required
-- object privilege to access the table.
GRANT DB_EMP TO EMP_ROLE;
GRANT DB_EMP TO IT_ROLE;
GRANT DB_EMP TO HR_ROLE;
See "hrdemo_setup.sql" for more information.
Using RASADM to Create Application Roles
To get started, click the Roles tab, then click Create Role.
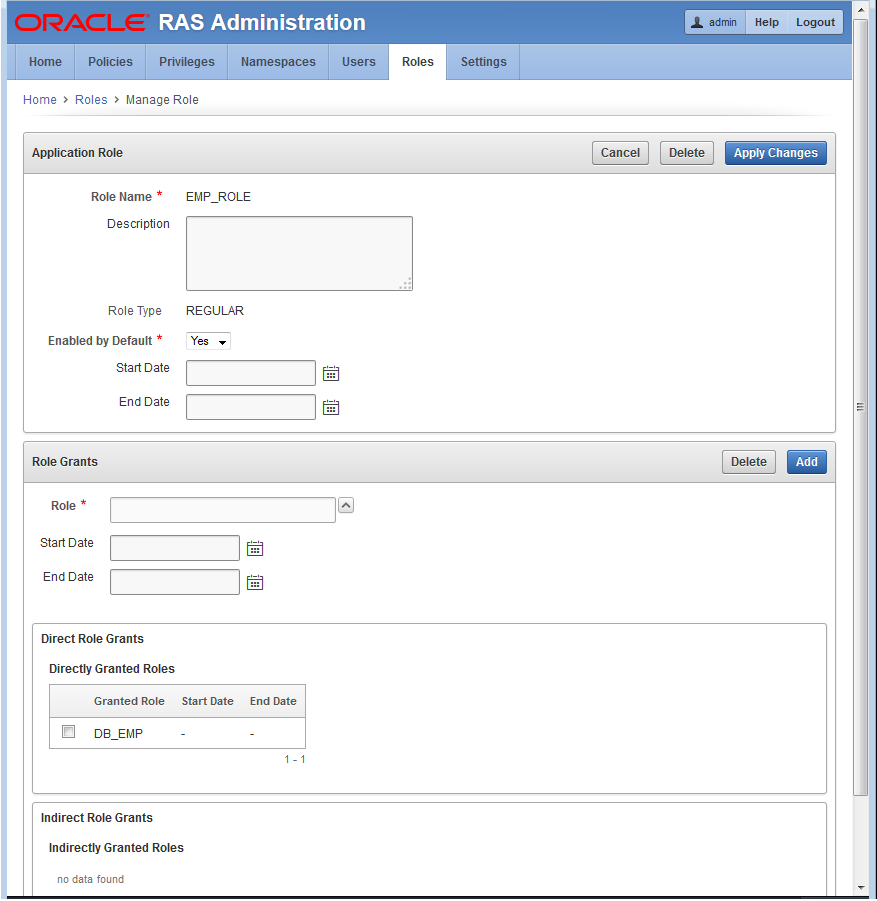
On the Application Role page, enter information in the following fields:
-
Role Name: Enter
EMP_ROLE. -
Description: Enter a brief description.
-
Type of Role: Select the default,
ROLE. -
Enabled by Default: Select
Yes.
In Roles Grant section, in the Roles field, click ^ and select DB_EMP role from the list to add it as a direct role grant.
Click Apply Changes to create the EMP_ROLE application role.
Click the role EMP_ROLE to see the edit view of this role as shown in Figure 12-3.
Figure 12-3 The Role EMP_ROLE that Is to Be Granted to Employees.
Description of "Figure 12-3 The Role EMP_ROLE that Is to Be Granted to Employees."
Repeat these steps to create the IT_ROLE and HR_ROLE application roles. Again, there are no application roles to be granted to either of these application roles.
Creating Application Users
This task involves creating each application user and granting each application user its respective application role.
This task can be performed in one of two ways:
-
Using RASADM to create application users:
DAUSTINandSMAVRIS.Next, perform the following grants:
-
Grant application roles
EMP_ROLEandIT_ROLEtoDAUSTIN. -
Grant application roles
EMP_ROLEandHR_ROLEto SMAVRIS.
-
-
Using an external directory server to create the application users or application user groups in the directory server.
In either case, for this HR Demo, the following application users will be created:
-
DAUSTIN -
SMAVRIS
Next, you will perform the following grants:
-
Grant the application role
EMP_ROLEto userDAUSTINandSMAVRIS. -
Grant the application role
IT_ROLEto userDAUSTIN. -
Grant the application role
HR_ROLEto userSMAVRIS.
Using RASADM to Create Application Users
To get started, click the Users tab, then click Create User.
On the Manage User page in the Application User section, enter information in the following fields:
-
Name: Enter
DAUSTIN. -
Description: Enter a brief description.
-
Default Schema: Select
HR. -
Roles Default Enabled: Select
Yes. -
Status: Chose
Active.
In the Roles Grants section, select the application roles to be granted to the application user daustin. Enter information in the following field:
-
Role: Click ^ and select the
EMP_ROLE.
Click Add to grant this role. Repeat this process to grant the IT_ROLE to DAUSTIN.
Click Apply Changes to create the application user DAUSTIN.
Click user DAUSTIN to see the edit view of this user as shown in Figure 12-4.
Figure 12-4 IT Department Employee DAUSTIN Granted EMP_ROLE and IT_ROLE Roles.

Description of "Figure 12-4 IT Department Employee DAUSTIN Granted EMP_ROLE and IT_ROLE Roles. "
Repeat these steps to grant the EMP_ROLE and HR_ROLE to application user SMAVRIS.
Creating the Data Security Policy
This task involves creating the HRDEMO data security policy. It includes:
-
Entering the policy information.
-
Creating the
HRPRIVSprivilege class and itsVIEW_SALARYprivilege. -
Creating the
SALARYcolumn authorization and selecting theHRPRIVSprivilege class to be applied to the column. -
Creating the data realm authorization consisting of the three data realms, one for employee access, one for IT access, and one for HR access along with each associated ACL with its respective defined privilege grant for each principal to control its row access.
-
Applying the
HRDEMOdata security policy by enabling it.
To create a data security policy, click Policies, then click Create to display the Policy Information page.
On the Policy Information page, enter the policy information in the following fields:
-
Policy Schema: Click ^ and select
HR. -
Policy Name: Enter the name
Employees_DS. -
Description: Enter a brief description for this policy.
-
Privilege Class: Click NEW to create the
HRPRIVSprivilege class.On the Privilege Class page, enter the following information:
-
Privilege Class
-
Privilege Class Name: Enter
HRPRIVS. -
Description: Enter a brief description.
-
-
Application Privileges
-
Privilege Name: Enter the name
VIEW_SALARY -
Description: Enter a brief description.
-
Implied Privileges: Click
Select.
Click Add to add the
VIEW_SALARYprivilege to the Application Privileges list. See Figure 12-5.Click Apply Changes to save the
HRPRIVSprivilege class. -
-
-
Protected Object's Schema: Click ^ and select
HR. -
Protected Object: Click ^ and select
EMPLOYEES.
Figure 12-5 The HR.HRPRIVS Privilege Class to Be Used in the Column Authorization.
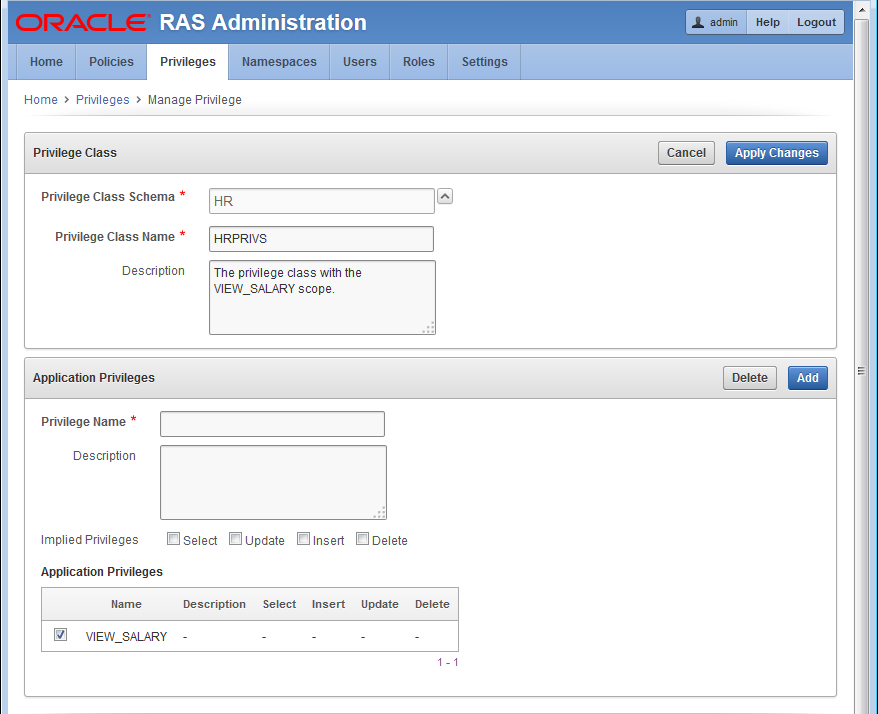
Description of "Figure 12-5 The HR.HRPRIVS Privilege Class to Be Used in the Column Authorization."
See Figure 12-6 to view the Policy Information page for the Employees_DS data security policy.
Figure 12-6 The EMPLOYEES_DS Policy Information
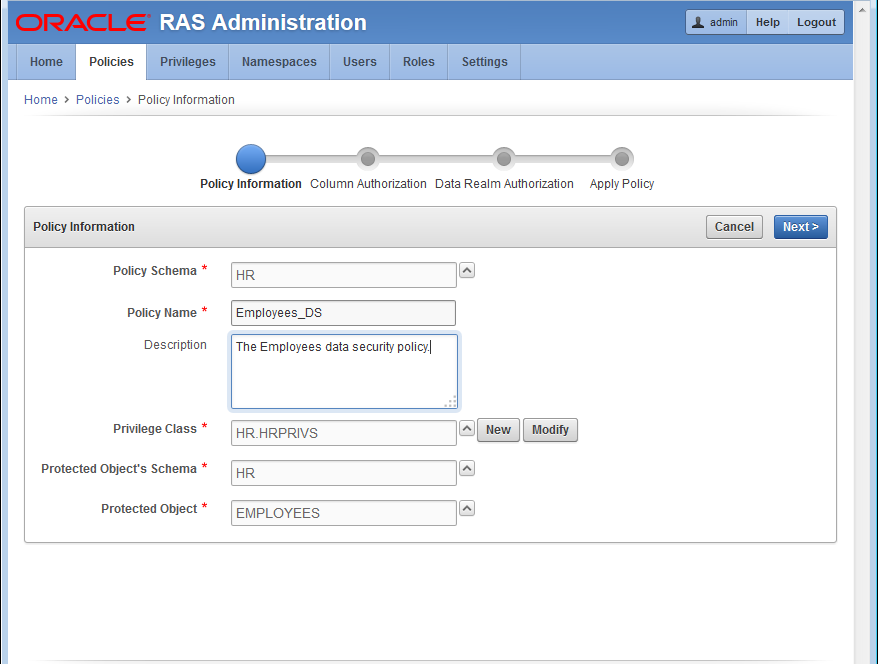
Description of "Figure 12-6 The EMPLOYEES_DS Policy Information"
Click Next to go to the Column Authorization page.
Creating the Column Authorization
On the Column Authorization page, enter the following information to create a column authorization:
-
Column: Click ^ and select
SALARY. -
Privilege: Click ^ and select
VIEW_SALARY.
Click Add to add the column authorization to the Column Constraint list.
See Figure 12-7 to view the Column Authorization page that shows the SALARY column authorization for employees with the VIEW_SALARY privilege.
Click Next to go to the Data Realm Authorization page.
Creating the Data Realm Authorizations
Three data realm authorizations will be created that:
-
Allows a user granted the
IT_ROLEto view records in the IT department excluding theSALARYcolumn. -
Allows a user granted the
EMP_ROLEto view their own record including theSALARYcolumn -
Allows a user granted the
HR_ROLEto view and update all records including theSALARYcolumn.
On the Data Realm Authorization page, enter information in the following fields to create the data realm for the IT department:
Data Realm This data realm authorization is for IT Department member access to their department records, excluding the SALARY column.
-
Description: Enter a brief description.
-
SQL Predicate: Click > to expand the Predicate Builder field. Enter information in the following fields:
-
Column Name: Click ^ to select the DEPARTMENT column name.
-
Operator: Click ^ to select the = operator.
-
Value: Enter the value 60.
-
AND/OR: Ignore this option.
Click Apply to create the SQL predicate. See Figure 12-8.
-
Figure 12-8 The IT Department Data Realm Authorization.
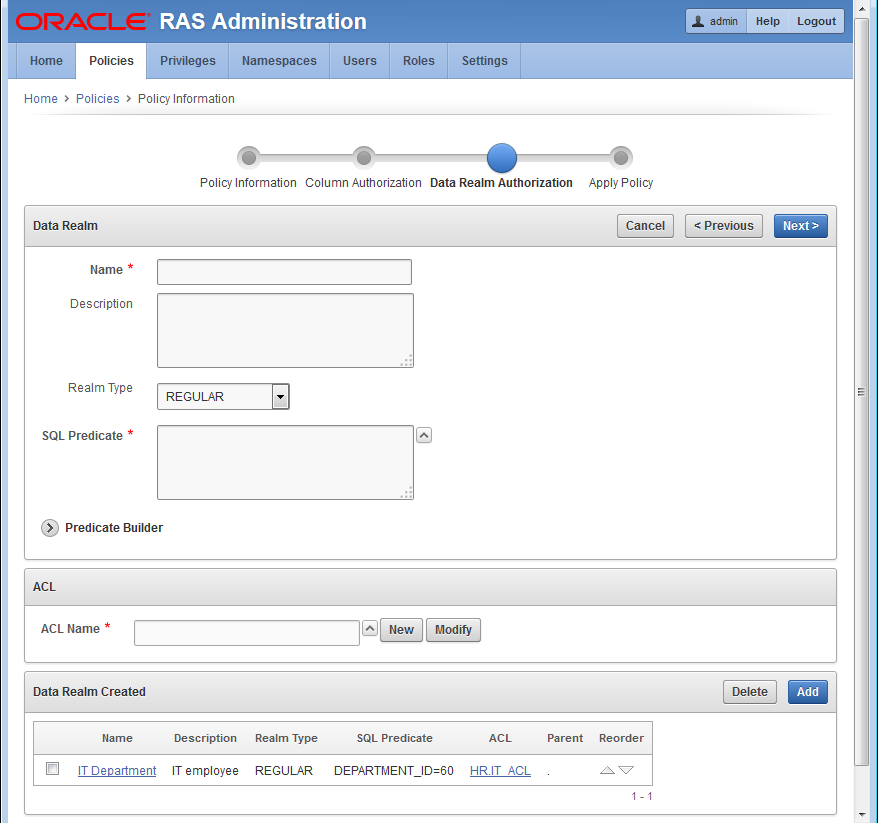
Description of "Figure 12-8 The IT Department Data Realm Authorization."
ACL Name: Click + to create the IT_ACL. Enter information in the following fields:
ACL Control Lists (ACL)
-
ACL Name: Enter
IT_ACL. -
Description: Enter a brief description.
-
ACL Inheritance: Ignore this field.
Privilege Grants
-
Principal: Click <- to select a principal.
Principal Type: Click User.
Principal Store: Click Database.
Principal Filter: Enter
DAUSTINand click Search. Then click Select to selectDAUSTINas the principal. -
Privilege: Choose the default option, SELECT.
-
Grant: Choose the option Grant.
Click Add to add this privilege grant. See Figure 12-9.
Figure 12-9 The HR.IT_ACL ACL to Limit IT Employees Access to Employee DAUSTIN.

Description of "Figure 12-9 The HR.IT_ACL ACL to Limit IT Employees Access to Employee DAUSTIN."
Data Realm Grant: Click Add to grant this data realm.
Data Realm This data realm authorization is for employee access to their own record, including the SALARY column.
Click Add to begin to add the next data realm authorization.
-
Description: Enter a brief description.
-
SQL Predicate: Enter
UPPER(email) = XS_SYS_CONTEXT('XS$SESSION','USERNAME').Click Preview to view the results of the query and see if it is what you expected.
ACL Name: Click + to create the EMP_ACL. Enter information in the following fields:
ACL Control Lists (ACL)
-
ACL Name: Enter
EML_ACL. -
Description: Enter a brief description.
-
ACL Inheritance: Ignore this field.
Privilege Grants
-
Principal: Click <- to select a principal.
Principal Type: Click User.
Principal Store: Click Database.
Principal Filter: Enter
DAUSTINand click Search. Then click Select to selectDAUSTINas the principal. -
Privilege: Choose the default option, SELECT.
-
Grant: Choose the option Grant.
Click Add to add this privilege grant. Then repeat this principal grant to for user daustin, but instead select VIEW_SALARY.
-
Principal: Click <- to select a principal.
Principal Type: Click User.
Principal Store: Click Database.
Principal Filter: Enter
DAUSTINand click Search. Then click Select to selectdaustinas the principal. -
Privilege: Choose the default option, VIEW_SALARY.
-
Grant: Choose the option Grant.
Click Add to add this privilege grant.
Repeat these same two grants for user SMAVRIS, so user SMAVRIS is granted SELECT and VIEW_SALARY application privileges.
Data Realm Grant: Click Add to add this data realm authorization to the list of data realm authorizations.
Data Realm This data realm authorization is for HR personnel to access and update all employee records, including the SALARY column.
Click Add to begin to add this next data realm authorization.
-
Description: Enter a brief description.
-
SQL Predicate: Click ^ to expand the Predicate Builder field. Enter information in the following fields:
-
Column Name: Click ^ to make a selection from the dialog box. Select 1=1 and the SQL Predicate field is populated.
Click Preview to view the results of the query and see if it is what you expected.
-
ACL Name: Click + to create the HR_ACL. Enter information in the following fields:
ACL Control Lists (ACL)
-
ACL Name: Enter
HR_ACL. -
Description: Enter a brief description.
-
ACL Inheritance: Ignore this field.
Privilege Grants
-
Principal: Click <- to select a principal.
Principal Type: Click User.
Principal Store: Click Database.
Principal Filter: Enter
SMAVRISand click Search. Then click Select to selectSMAVRISas the principal. -
Privilege: Choose the default option, SELECT.
-
Grant: Choose the option Grant.
Repeat this step to grant UPDATE to SMAVRIS.
-
Principal: Click <- to select a principal.
Principal Type: Click User.
Principal Store: Click Database.
Principal Filter: Enter
SMAVRISand click Search. Then click Select to selectSMAVRISas the principal. -
Privilege: Choose UPDATE.
-
Grant: Choose the option Grant.
Repeat this step two more times to grant INSERT and DELETE to SMAVRIS.
Click Add to add this privilege grant.
Data Realm Grant: Click Add to add this data realm authorization to the list of data realm authorizations. See Figure 12-10.
Figure 12-10 Completed HR.Employees_DS Data Security Policy.
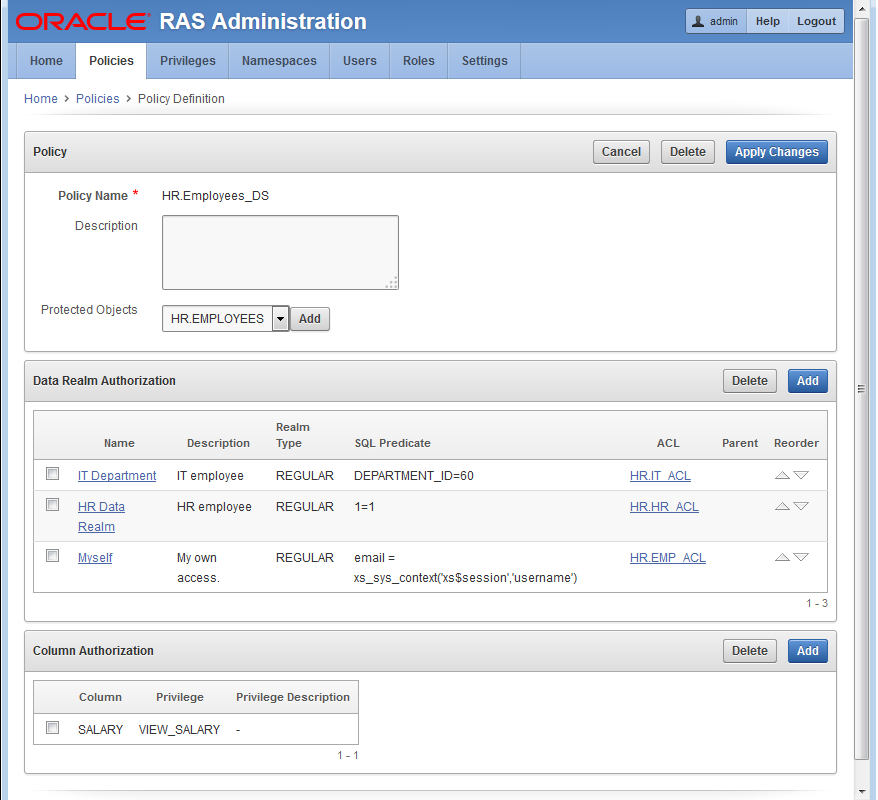
Description of "Figure 12-10 Completed HR.Employees_DS Data Security Policy."
Click Next to continue to the Apply Policy page.
On the Apply Policy page, enter information in the following fields:
-
Apply Policy: Select Enable to enable this data security policy. See Figure 12-11.
Click Apply Changes to create the Employees_DS data security policy. Figure 12-12 shows the created Employees_DS data security policy on the Policies page and that this policy is enabled.
Figure 12-12 Enabled HR.Employees_DS Data Security Policy

Description of "Figure 12-12 Enabled HR.Employees_DS Data Security Policy "

