5.13 Managing Annotations
You can add commentary and additional details to a web page by adding annotations. Annotations can be in the form of uploaded files, notes, links, and tags. Annotations can be added to both pages and data grid records.
5.13.1 Managing Uploaded Files and Images
You can upload files and images to a Websheet page using the Files region. Once uploaded, you can display uploaded images within a page section or embed download links to files.
5.13.1.1 Uploading Files and Images
To upload files and images to a Websheet:
-
Log in to and run the Websheet. See "Running a Websheet".
-
Under Files on the right side of the page, click the Add File icon.

Description of the illustration websheet_files.gif
-
On the Add File page:
-
File - Browse to locate the file to upload. Once uploaded, the file is associated with the current page. You can reference an uploaded file in any page using the image or file syntax. See "Displaying an Uploaded Image Inline" or online Help, Markup Syntax.
-
Alias - A file alias enables you to embed download links or image links within page sections. A file alias must be unique within an application.
-
Description - Enter descriptive text to describe the file.
-
-
Click Add File.
5.13.1.2 Including a Download Link in a Page Section
You can embed a download link within a page section to uploaded files using the following syntax.
[[ file: < file name > | < link name > ]]
[[ file: < file alias > | < link name > ]]
[[file: myfile ]]
[[file: myfile.xls ]]
[[file: myfile | My File ]]
This [[file: parts01.xls | spreadsheet ]] documents our part numbers.
5.13.1.3 Displaying an Uploaded Image Inline
After you upload an image, you can display it within any page section of an application by embedding a download link using the following syntax. You can reference an uploaded image using the image name or image alias.
Images defined for the current page are used before images associated with other pages. If image names are ambiguous, the most recently created image displays.
[[ image: < file name > | < properties > ]]
[[ image: < file alias > | < properties > ]]
[[image: myimage ]]
[[image: theimagename.jpg ]]
[[image: myimage | width="600" alt="my image" ]]
This diagram [[image: diagram1]] illustrates the work flow.
5.13.1.4 Editing or Deleting Uploaded Files
To edit details or delete uploaded files:
-
Log in to and run the Websheet. See "Running a Websheet".
-
In the Files region, click the Edit File icon.
The Details page appears.
-
To edit file details:
-
Edit the fields provided. See item Help for more details.
-
To accept your changes, click Apply Changes.
-
-
To delete a file:
-
Click Delete.
-
To accept your changes, click OK.
-
5.13.2 Adding Tags
Tags facilitate keyword searching within a Websheet.
5.13.2.1 Adding Tags
To add tags to a Websheet page:
-
Log in to and run the Websheet. See "Running a Websheet".
-
Under Tags on the right side of the page, click the Add Tag icon.

Description of the illustration websheet_tags.gif
-
Enter tags in the field provided. Separate multiple tags with a comma.
-
Click Apply Changes.
5.13.2.2 Editing Existing Tags
To edit existing tags:
-
Log in to and run the Websheet. See "Running a Websheet".
-
In the Tags region, click the Edit Tag icon.
The Details page appears.
-
Edit the tags and click Apply Changes.
5.13.3 Adding Notes
Use notes to record user comments.
5.13.3.1 Adding Notes
To add notes to a Websheet page:
-
Log in to and run the Websheet. See "Running a Websheet".
-
Under Notes on the right side of the page, click the Add Note icon.

Description of the illustration websheet_notes.gif
-
Enter text in the field provided.
-
Click Add Note.
5.13.3.2 Editing and Deleting Existing Notes
To edit or delete existing notes:
-
Log in to and run the Websheet. See "Running a Websheet".
-
In the Notes region, click the Edit Note icon.
-
To edit file details:
-
Edit the fields provided. See item Help for more details.
-
To accept your changes, click Apply Changes.
-
-
To delete a note, click Delete.
5.13.4 Viewing and Deleting Annotations
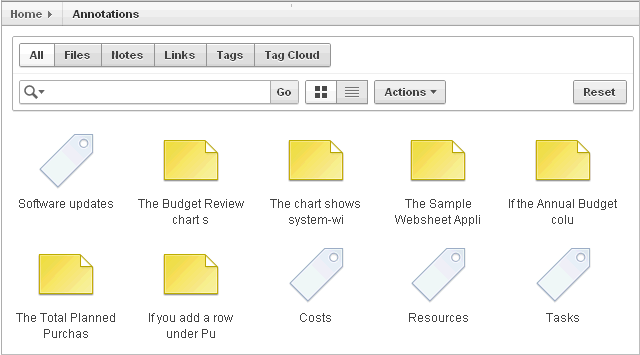
You can view and delete all Websheet annotations on the Annotations page. Annotations include uploaded files, notes, links, and tags that were either added to a Websheet page or to a specific row in a data grid.
5.13.4.1 Accessing the Annotations Page
To access the Annotations page:
-
Log in to and run the Websheet. See "Running a Websheet".
-
From the View menu, select Annotations.
The Annotations page appears.

Description of the illustration websheet_annot.gif
-
To view specific type of annotation, click the Files, Notes, Links, Tags, or Tag Cloud tabs.
5.13.4.2 Deleting Annotations
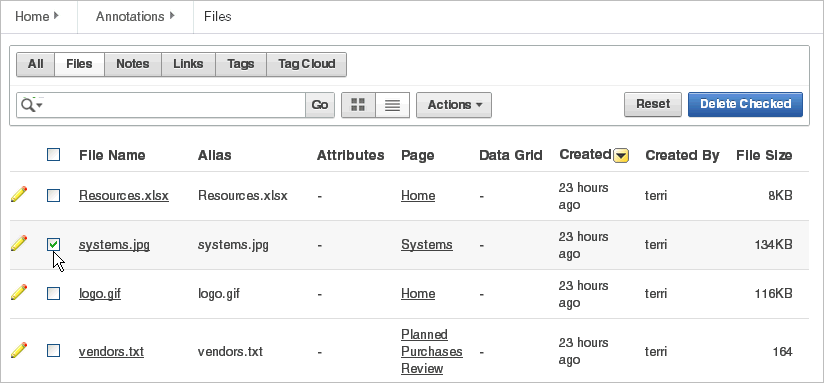
To delete uploaded files, notes, link, or tags:
-
Log in to and run the Websheet. See "Running a Websheet".
-
From the View menu, select Annotations.
The Annotations page appears.
-
Select an annotation type by clicking the appropriate tab at the top of the page.
-
Click the appropriate tab: Files, Notes, Links, Tags, or Tag Cloud.
-
Select the annotations to be deleted.
-
If not selected, click the View Report icon.

Description of the illustration websheet_annot_del.gif
-
Click Delete Checked.