11.1 Creating Tabs
Tabs are an effective way to navigate users between pages of an application. You can create a tabbed application look by using parent tabs, standard tabs, and lists.
An application can have pages with no tabs, one level of tabs, and two levels of tabs. Standard tabs enable you to display only one level of tabs. To display two levels of tabs define both Parent tabs and Standard tabs.
Tip:
As an alternative to tabs, you can use lists to display tab controls. List templates provide greater control over HTML generation. See "Creating Lists".Note:
When running the Create Application Wizard, you have the option of creating an application with tabs. The following procedures assume you have created an application that does not have any tabs.See Also:
"About Creating a Database Application"11.1.1 About Tabs
A standard tab can have a one-to-one relationship with a page, or a standard tab can be the current tab for many pages. Application Builder includes two different types of tabs:
-
Standard tabs
An application having only one level of tabs uses a standard tab set. A standard tab set is associated with a specific page and page number. You can use standard tabs to link users to a specific page.
-
Parent tabs
Parent tabs can control the display of standard tab sets. Clicking a parent tab displays the corresponding standard tab, with the default page as the current page. Parent tabs give users another level of navigation and a context (or sense of place) within the application. You can use parent tabs to link users to a specific URL associated with a specific page.
You can group tabs into collections called a tab set. Each tab must be part of a tab set.
11.1.1.1 About Template Support
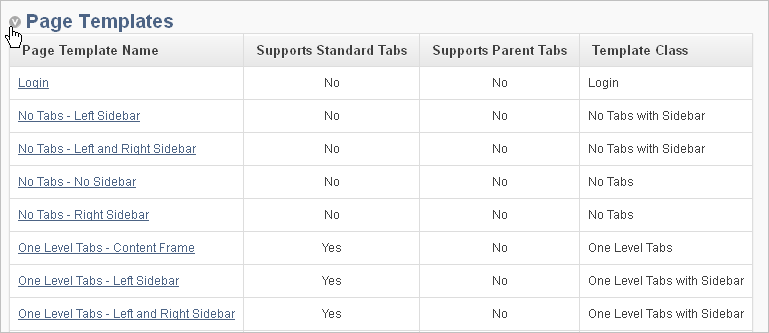
Before you can create parent and standard tabs, you must check that your default template has positions defined for both standard and parent tabs using the appropriate substitution strings. You also must make sure you do not override this template at the page-level.
To view page templates:
-
On the Workspace home page, click the Application Builder icon.
-
Select an application.
-
On the Application home page, click Shared Components.
-
Under Navigation, click Tabs.
The Tabs page appears.
-
Locate Page Templates at the bottom of the page. If needed, expand the Page Templates region.

Description of the illustration tabs_pg_templates.gif
See Also:
-
"Managing Themes" for information about setting a default page template at the application level
11.1.2 About the Tabs Page
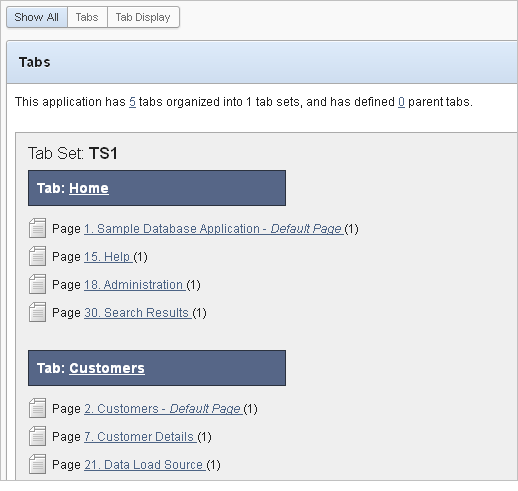
The Tabs page describes the tabs defined in your application.
To access the Tabs page:
-
On the Workspace home page, click the Application Builder icon.
-
Select an application.
-
On the Application home page, click Shared Components.
-
Under Navigation, click Tabs.
The Tabs page appears.

Description of the illustration tabs.gif
The sections that follow describe the Tab Display and Page Templates section of the Tabs page.
Tip:
You can also access the Tabs page under Shared Components on the Page Definition. See "Accessing the Page Definition".11.1.2.1 Tab Display
Tab Display provides additional information about how the current tabs or tab set are configured to display.
11.1.2.2 Page Templates
Page Templates displays a report of page templates associated with the current application. See "About Template Support".
11.1.3 Creating a Tab
An application can have pages with no tabs, one level of tabs, and two levels of tabs. Standard tabs enable you to display only one level of tabs. To display two levels of tabs define both Parent tabs and Standard tabs. See "About Tabs".
To create a tab:
-
Access the Tabs page:
-
On the Workspace home page, click the Application Builder icon.
-
Select an application.
-
On the Application home page, click Shared Components.
-
Under Navigation, click Tabs.
-
-
Click Manage Tabs.
-
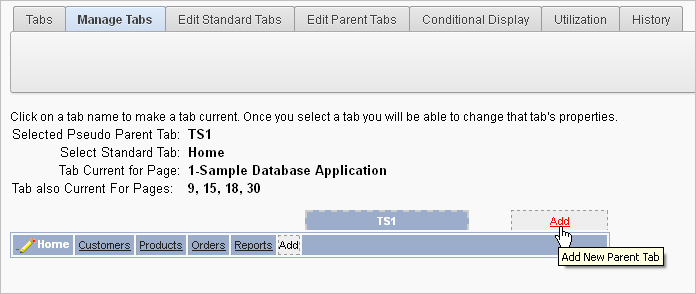
To add a Parent tab, click the Add button in the upper row.

Description of the illustration tabs_add_parent.gif
Parent tabs can control the display of standard tab sets. Clicking a parent tab displays the corresponding standard tab, with the default page as the current page.
-
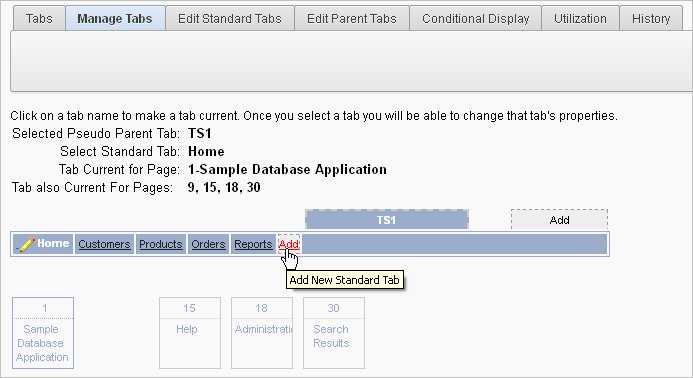
To create a Standard tab, click the Add button in the lower row.

Description of the illustration tabs_add_standard.gif
The Create Parent Tab or Create Standard Tab Wizard appears.
-
Follow the on-screen instructions.
11.1.4 Editing Tabs
You can edit multiple tabs simultaneously. Also, for standard tabs, you can update tab properties, such as their labels and order sequence, by using the Standard Tab Tasks list.
11.1.4.1 Editing Multiple Tabs Simultaneously
You can edit multiple tabs simultaneously.
To edit multiple tabs simultaneously:
-
Navigate to the Tabs page:
-
On the Workspace home page, click the Application Builder icon.
-
Select an application.
-
Click Shared Components.
-
Under Navigation, click Tabs.
-
-
Click one of the following tabs at the top of the page:
-
Edit Standard Tabs
-
Edit Parent Tabs
A report appears.
-
-
To edit a specific tab, click the Edit icon.
-
Edit the appropriate attributes and click Apply Changes.
11.1.4.2 Using the Standard Tab Task List
The Standard Tab Task list displays on the right side of the Tabs page. You can access the links on this list to rename a standard tab set, resequence the display order, associate pages with a tab set, create a new standard tab, or create a new standard tab set.
To access the Standard Tab Task list:
-
Navigate to the Tabs page:
-
On the Workspace home page, click the Application Builder icon.
-
Select an application.
-
Click Shared Components.
-
Under Navigation, click Tabs.
-
-
Click Manage Tabs.
-
Make a selection from the Standard Tab Task list:
-
Rename Standard Tab Set
-
Resequence Display Order
-
Associate Page(s) with Selected Standard Tab
-
Create New Standard Tab
-
Create New Standard Tab Set
-
11.1.5 Accessing Tab Reports
This section describes the Conditional Display, Utilization, and History reports.
To view the Conditional Display report:
-
Navigate to the Tabs page:
-
Navigate to the Workspace home page.
-
Click the Application Builder icon.
-
Select an application.
-
On the Application home page, click Shared Components.
-
Under Navigation, click Tabs.
The Tabs page appears.
-
-
Click the appropriate tab:
-
Conditional Display
-
Utilization
-
History
-
To learn more, see the sections that follow.
11.1.5.1 Conditional Display
The Conditional Display report displays Standard Tabs and Parent tabs that are configured to display conditionally. To filter the display, select tab type and click Go.
11.1.5.2 Utilization
The Utilization report lists the standard tabs used in the current application.