Preprocessing the Workload and Deploying the Replay Clients
The final preparation for the replay consists of:
-
Preprocessing the workload
You need to preprocess each captured workload once for each version of the database against which the workload will be replayed. After you preprocess the workload once, you can use it for any subsequent replay tasks and replays without needing to preprocess again, as long as the test database is the same version as the database where the workload was preprocessed.For instance, for a replay task that contains two replays named "MyReplay1" and "MyReplay2," after you have preprocessed "MyReplay1", you can just directly reuse the directory object to replay "MyReplay2."
The Workload Analyzer report is available after preprocessing.
-
Deploying the replay clients
You do not need to deploy the replay clients to other replay client hosts if these hosts can access the Oracle home of the test database you specified in the Database Target Name field.
The following procedures explain how to accomplish each of these tasks.
To preprocess the workload:
-
From the Replay page for your particular replay, click the link for the Preprocess Workload task.
The Preprocess Captured Workload: Locate Workload page appears.
-
Select the desired workload location option, then click Next.
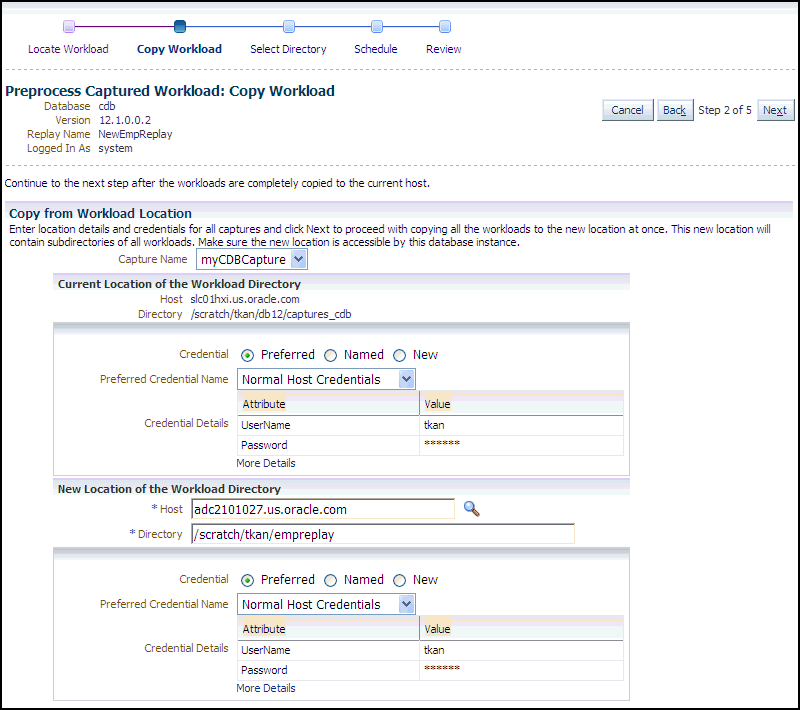
The Preprocess Captured Workload: Copy Workload page appears.
-
Provide the required credentials and the new location to which the workloads will be copied and preprocessed, then click Next.
-
For a consolidated replay, there are multiple source workloads, so multiple source credentials might be needed for the current location of the workload directory. For more information on consolidated replays, see "Using Consolidated Database Replay with Enterprise Manager."
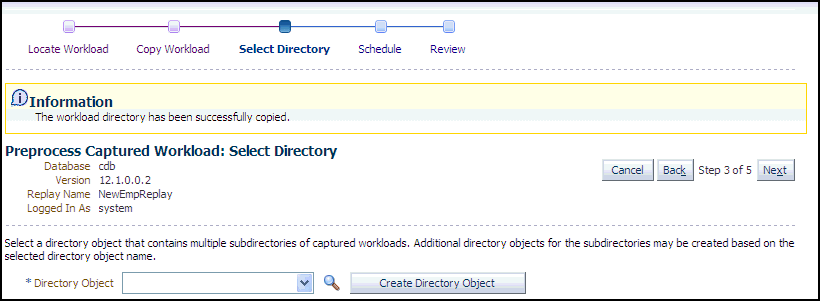
The system responds by displaying a progress bar graph during processing, then displays the Preprocess Captured Workload: Select Directory page after the copy operation concludes.
-
-
Specify the Directory Object, or create a new Directory Object that points to the location that contains the workload. If you chose to copy from the workload location to a new location in the previous step, make sure that the directory object points to the exact location you specified in the New Location of the Workload Directory section.
The system responds by displaying a Capture Summary. You can now expand the Capture Details section to see the workload profile and workload filters. The Capture Summary does not appear for consolidated replays.
Click Next to display the Preprocess Captured Workload: Schedule page.
-
Provide input to schedule the preprocess job:
-
Provide your own required job name or accept the system-supplied name. The job system automatically names the job in uppercase.
-
Indicate whether you want the job to run as soon as you submit it, or whether you want it to run at a later time.
-
Provide the host credentials, which are used to run the preprocess job in the operating system.
Click Next to display the Preprocess Captured Workload: Review page.
-
-
Check to make sure that the settings are what you intend, then click Submit.
The Database Replay page appears, and assuming that there were no errors in your input, a confirmation message at the top of the page states "Job JOBNAME to prepare the workload has been created successfully."
-
Click the JOBNAME link to check the status of the job. The job must succeed before you can proceed to the Replay Workload task.
A message may appear in the Task List stating that you need to install an additional PL/SQL package in the test database to generate a compare period report after the trial. Click Install PL/SQL Package to resolve this issue before proceeding to the Replay Workload task.
After preprocessing a captured workload, you can replay it on the test system, as described in Replaying a Database Workload .
To deploy the replay clients:
-
From the Replay page for your particular replay, click the link for the Deploy Replay Clients task.
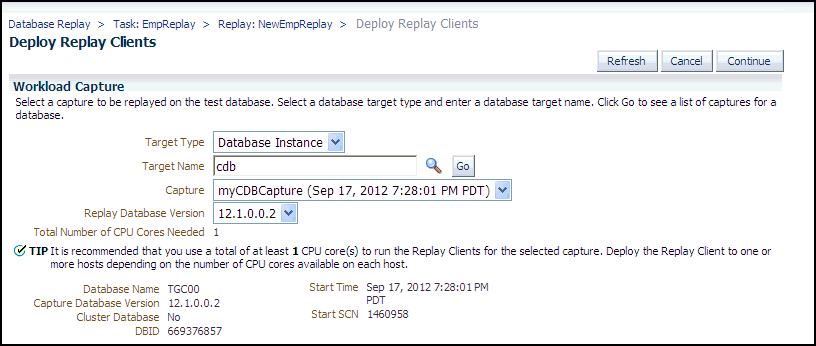
The Deploy Replay Clients page appears.
-
Accept the default values defined for the associated workload capture, or override these values, then click Continue.
The Provision Oracle Database Client wizard appears.
-
Follow the instructions provided in the online help for each step of the wizard.
After you click Submit in the Review step to run the deployment procedure according to the schedule you have set, the Replay Summary page reappears.


